SENSORS
-
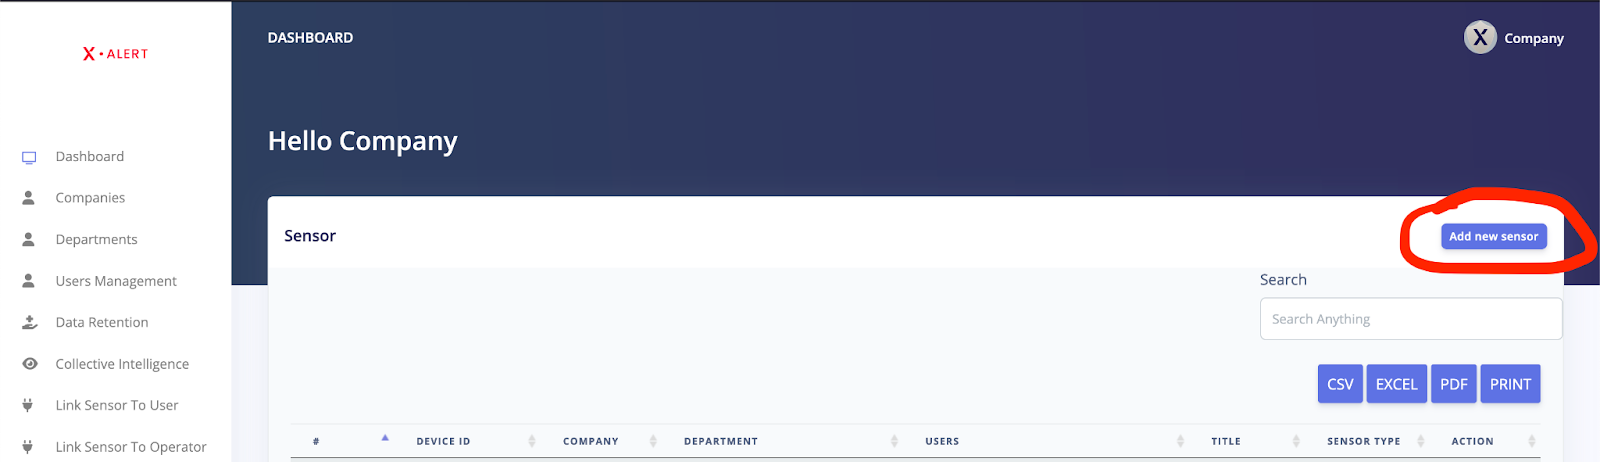
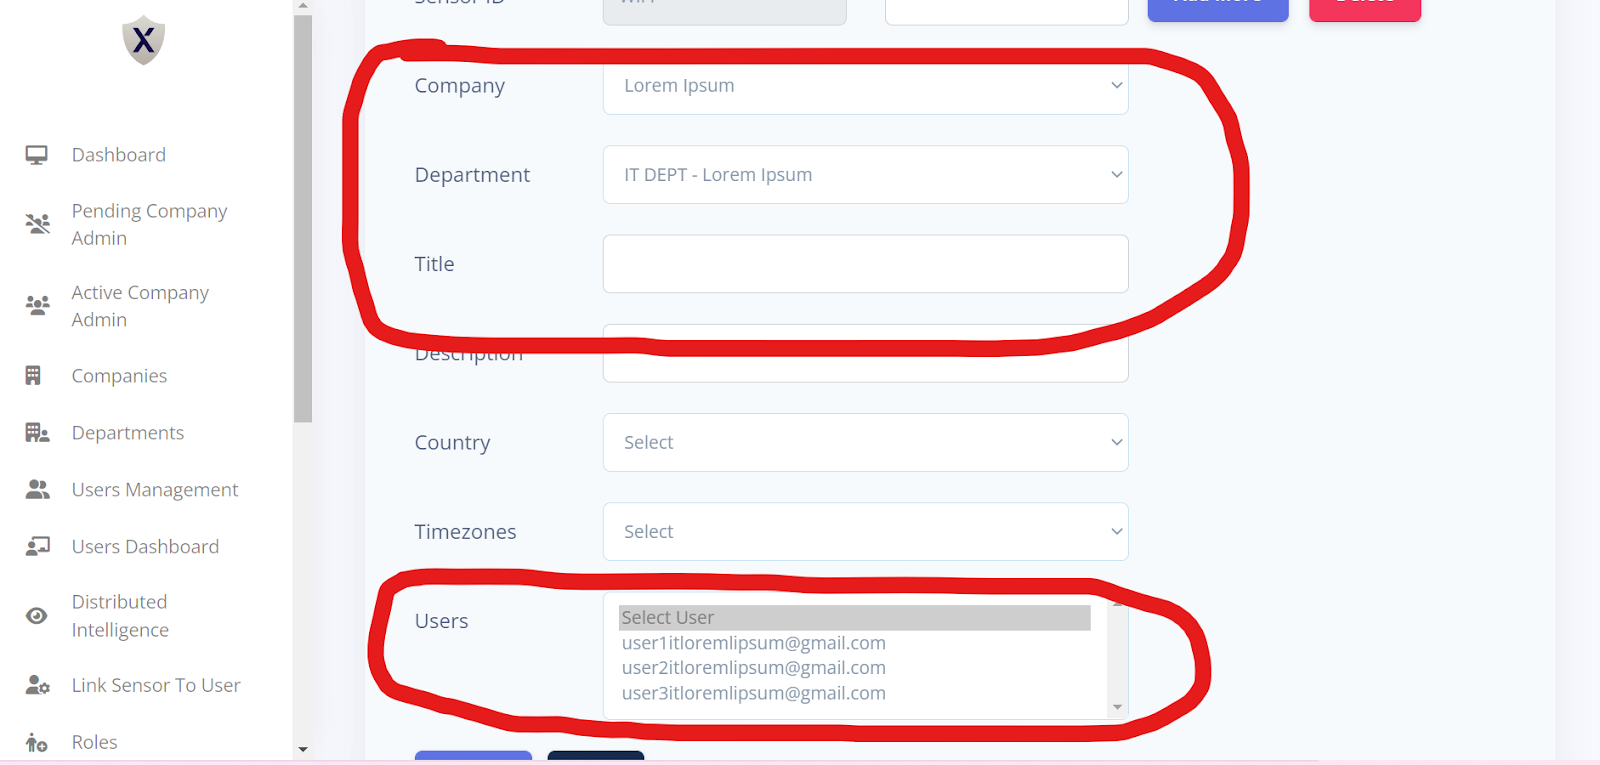
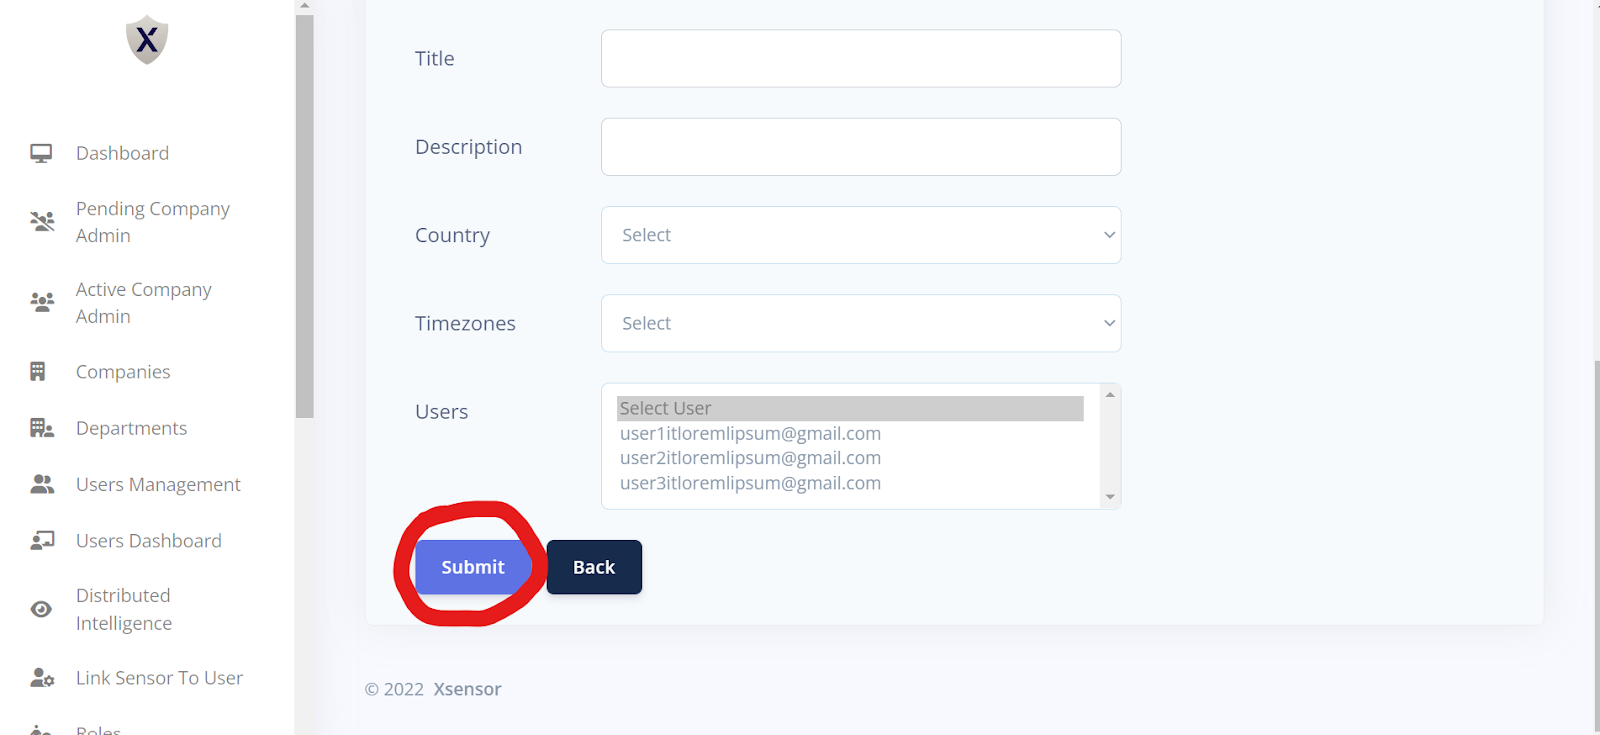
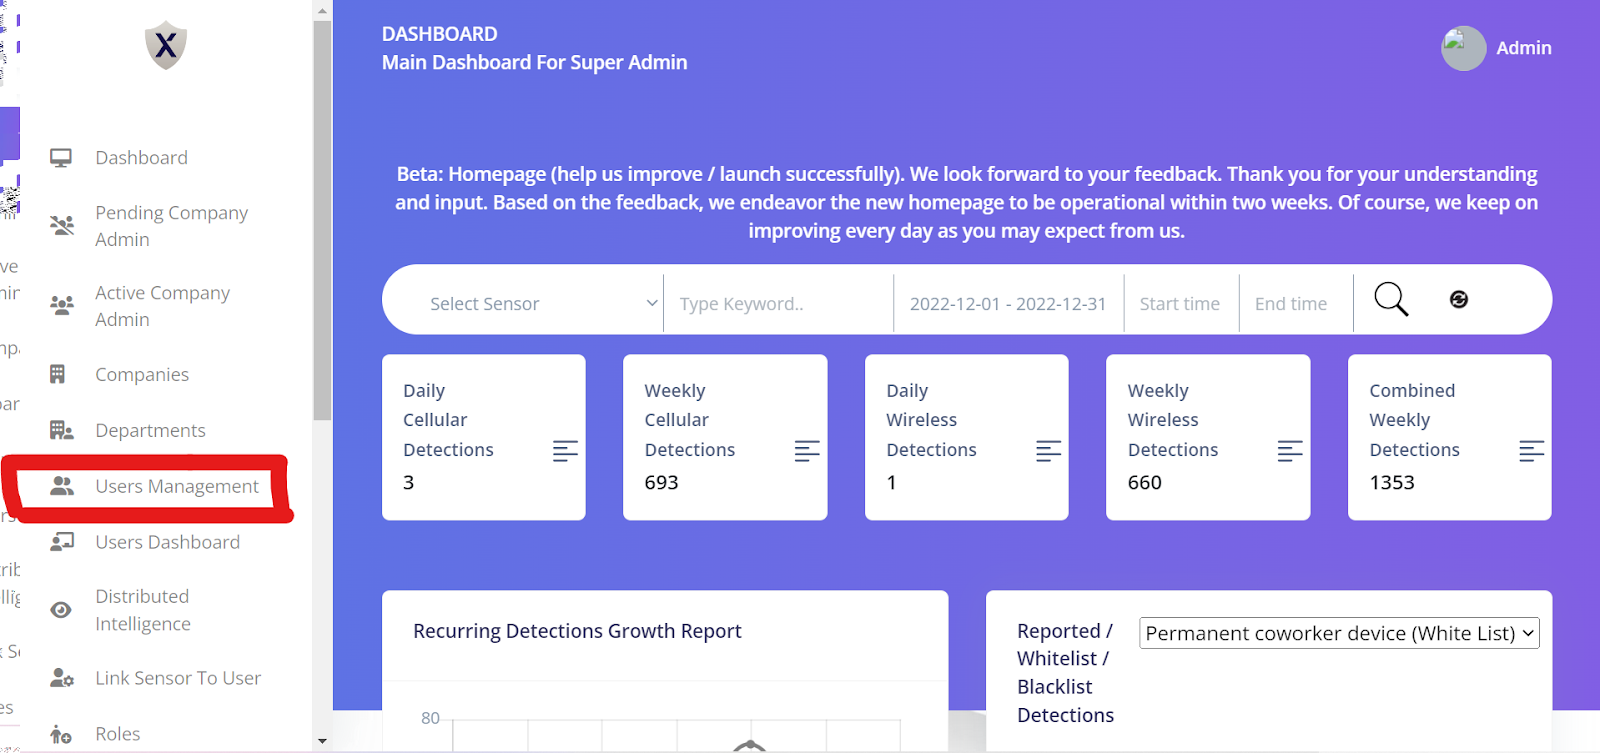
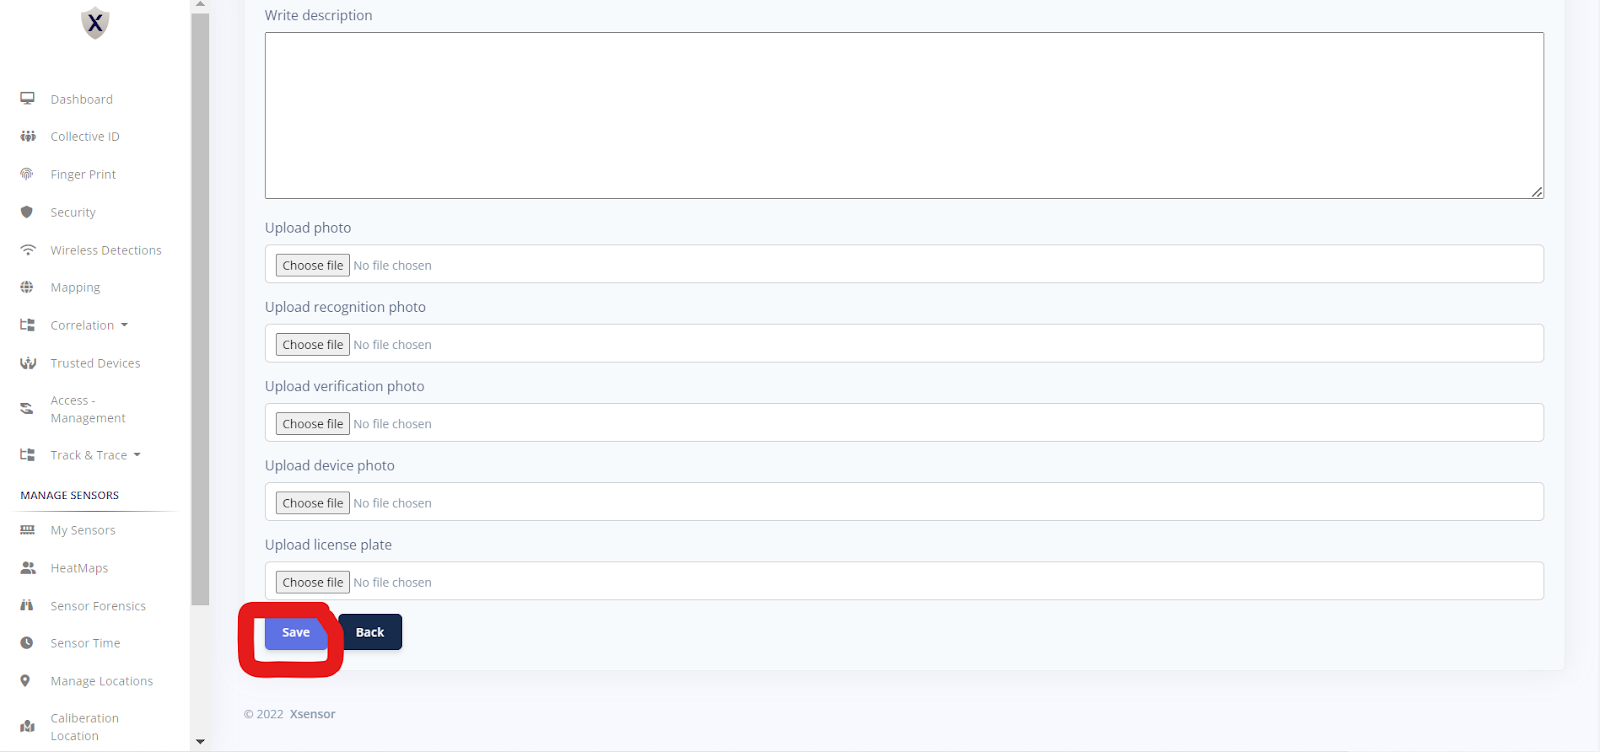
How Can We Create A Sensor?
CREATE A SENSOR
Why create a Sensor?
Our sensors are state of the art detection devices that are used to monitor, generate profile based on which our system provides predictive analysis.
Who can create a Sensor?
The following user roles are able to create sensors:
X-Alert Super Admin Account
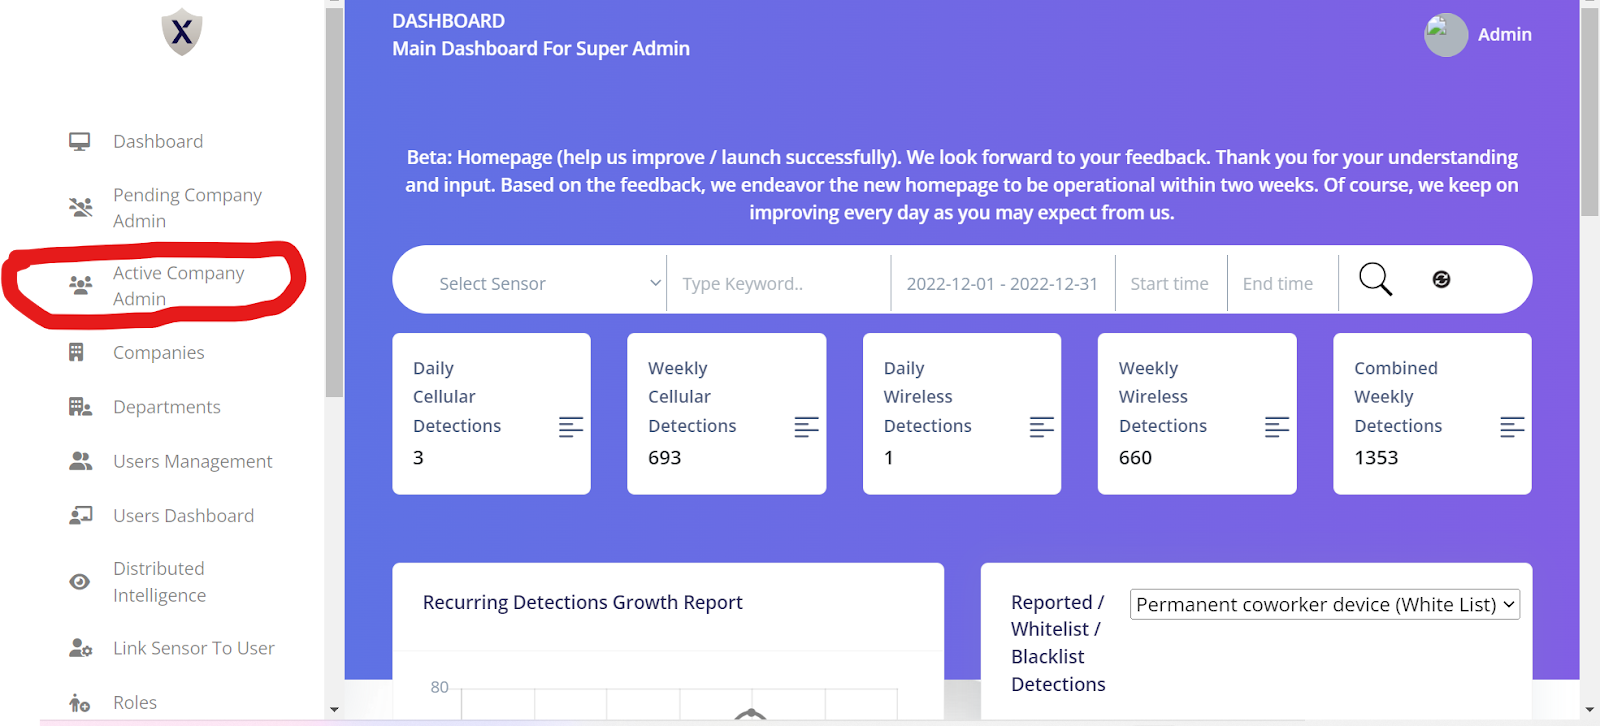
A super admin has control of overall companies in the system, this particular role is able to create / manage sensors for all the companies that are registered.
Company Admin Account
A company admin has control of his company, this role is able to create / manage sensors within its company account.
Steps to create a Sensor:
-
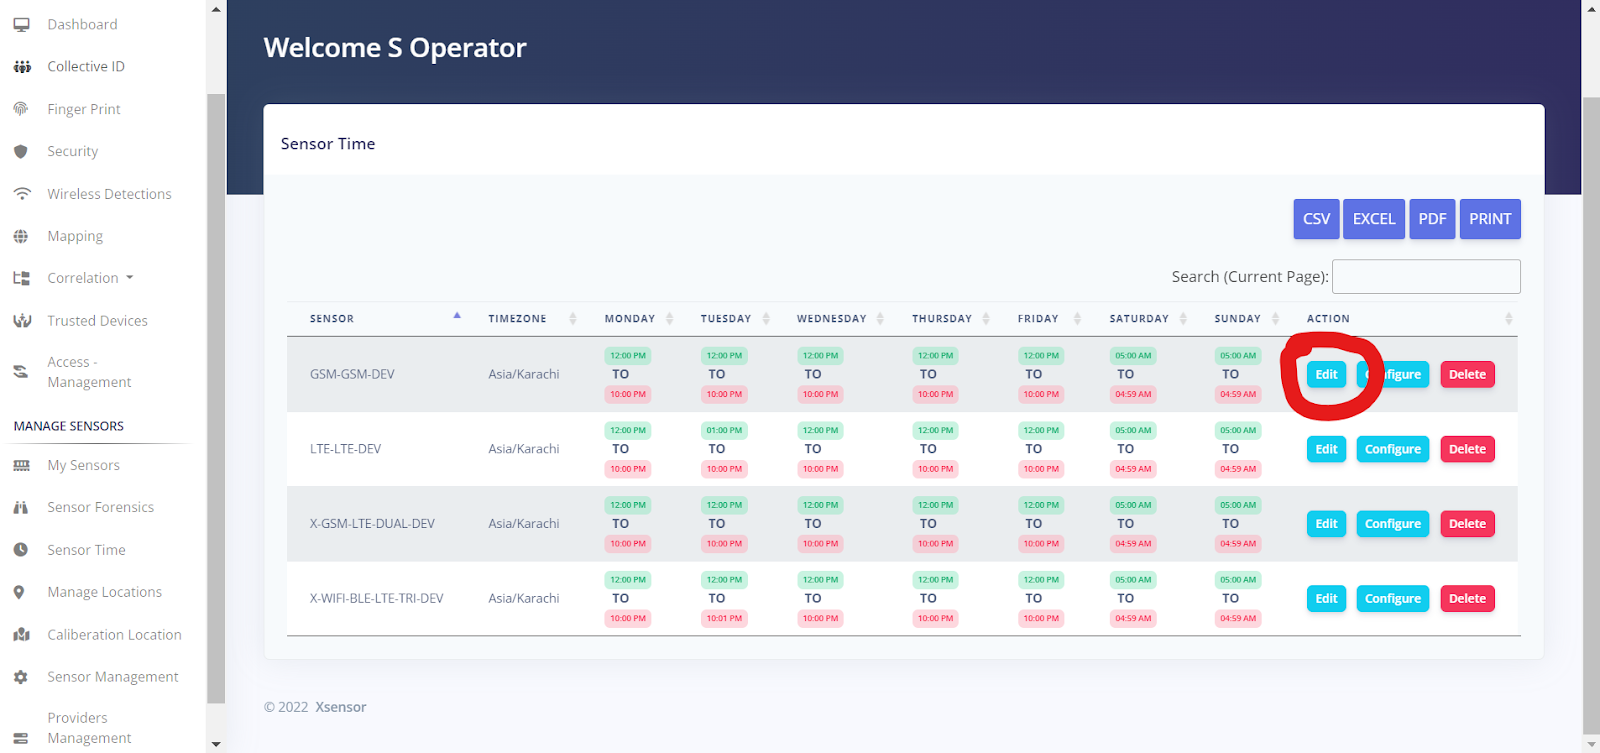
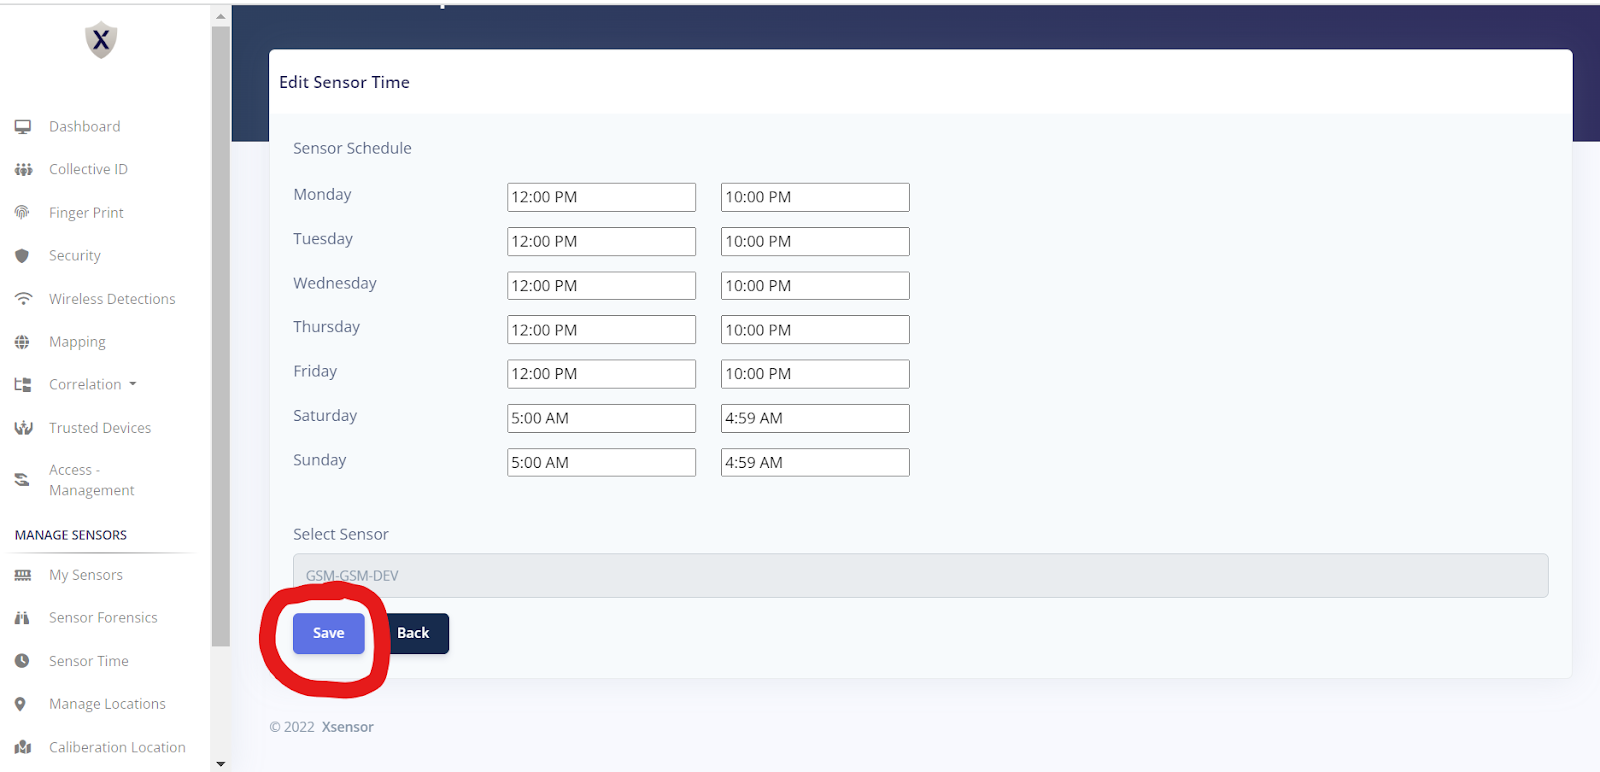
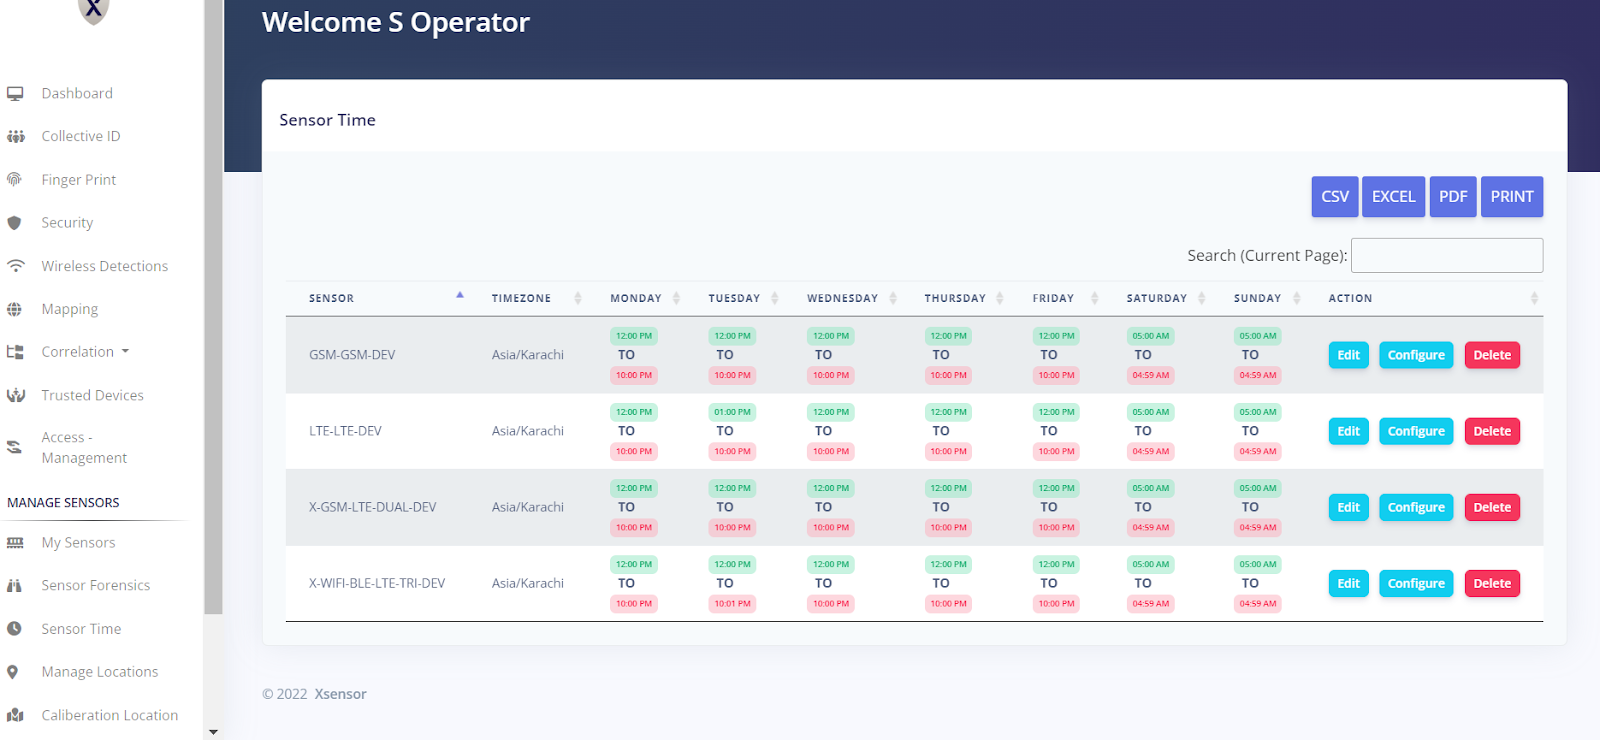
How can we manage Sensor Time Configuration?
Sensor Time Configuration
Why is time configuration important to understand?
The specific time slot for the sensor to work can be adjusted with sensor time configuration. For example, you have a store that works from 9 AM – 9 PM, and you need sensors to work for that particular time slot.
You can work with the sensor time configuration to set it up and keep it activated during those hours.
Who can manage sensor time configuration?
The following user roles can create sensors:
Operators
Users
Steps to Manage Sensor Time Configuration
-
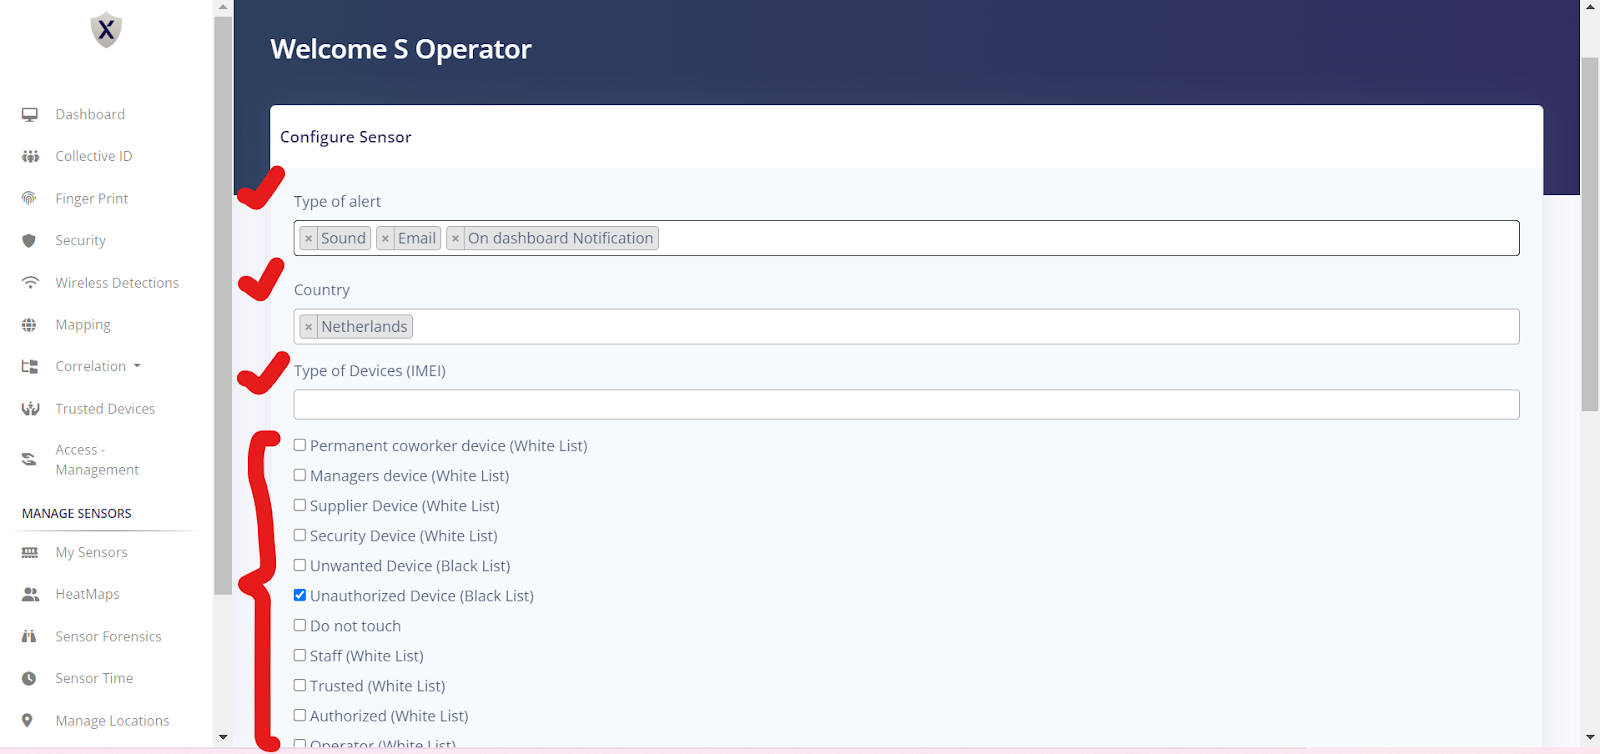
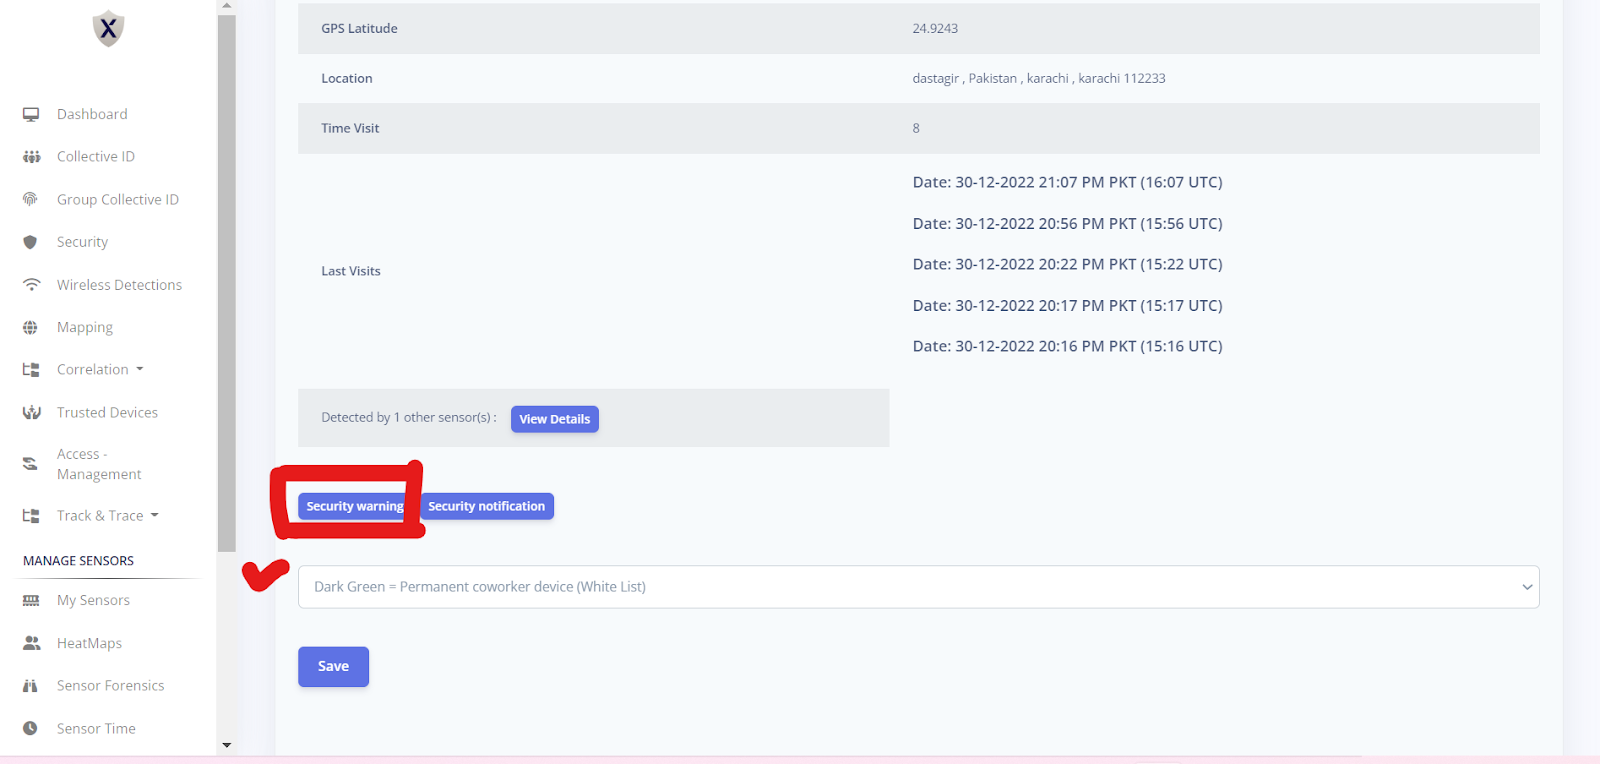
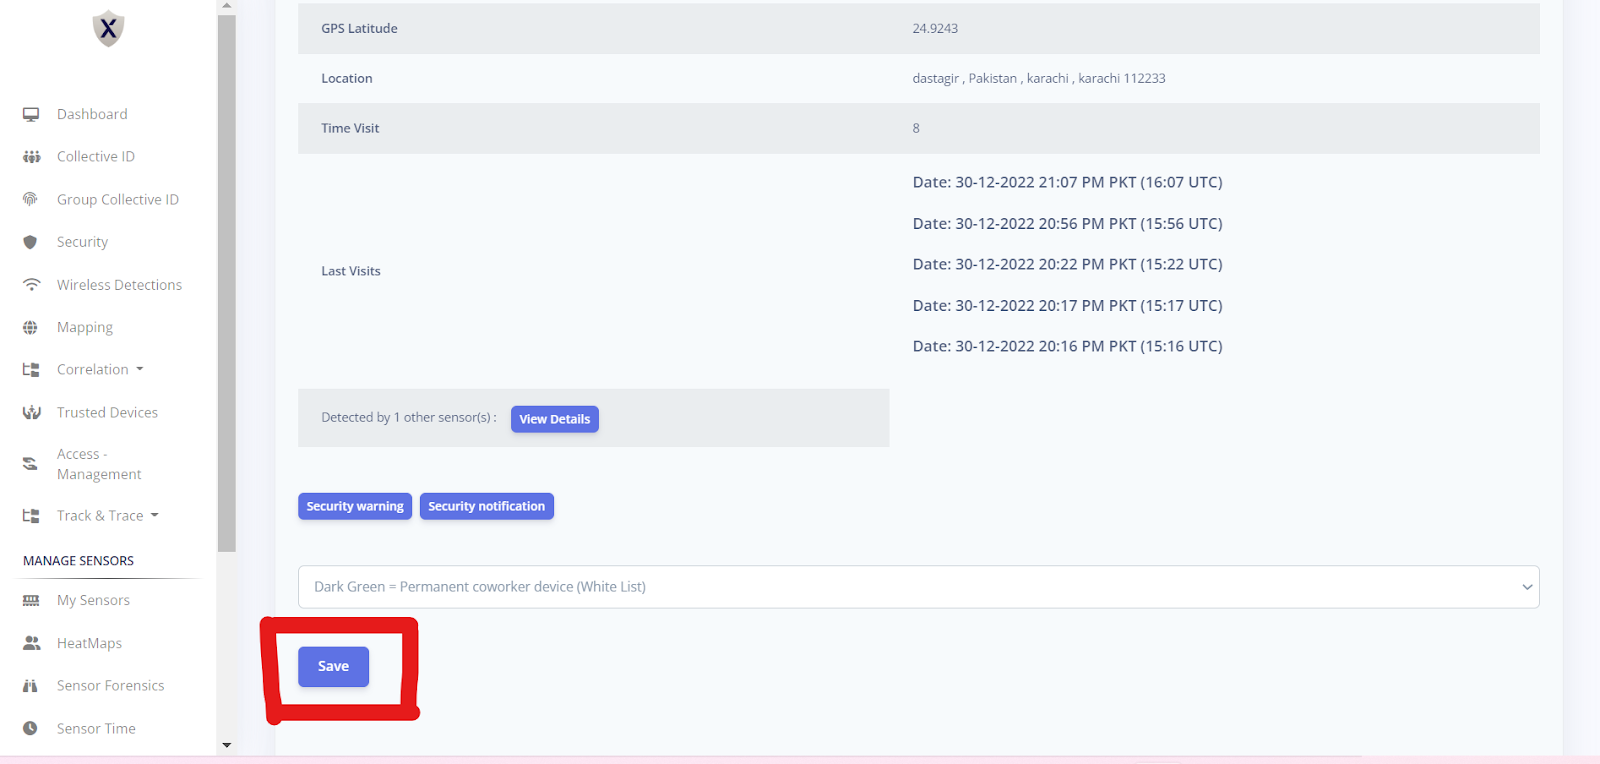
How to manage Sensor Alert Configuration?
Sensor Alert Configuration
Who can manage Sensor Alert Configuration?
The following user can manage the Sensor Alert Configuration:
Operator
Steps to Manage Sensor Alert Configuration
-
Who can assign providers to the sensors?
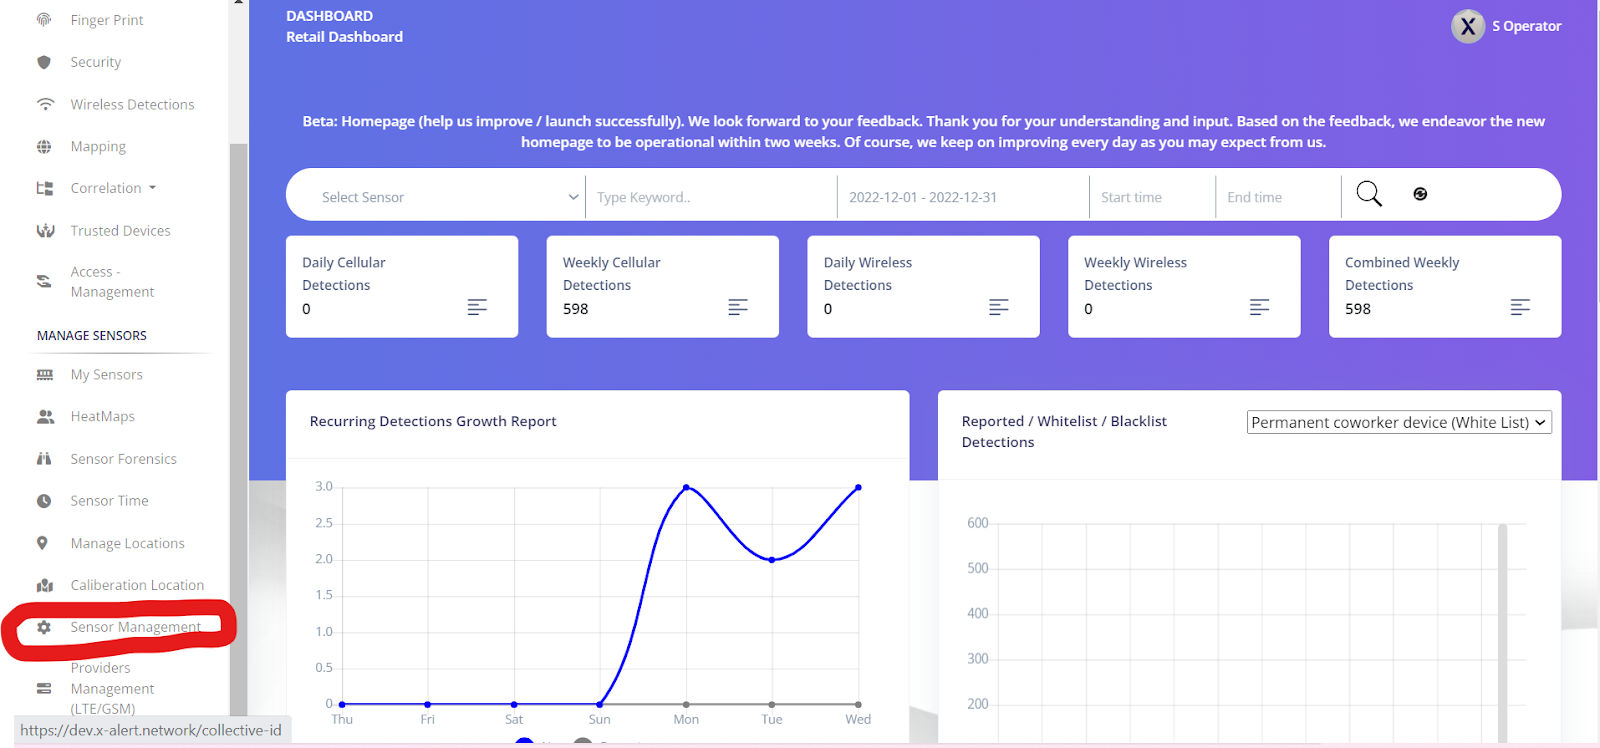
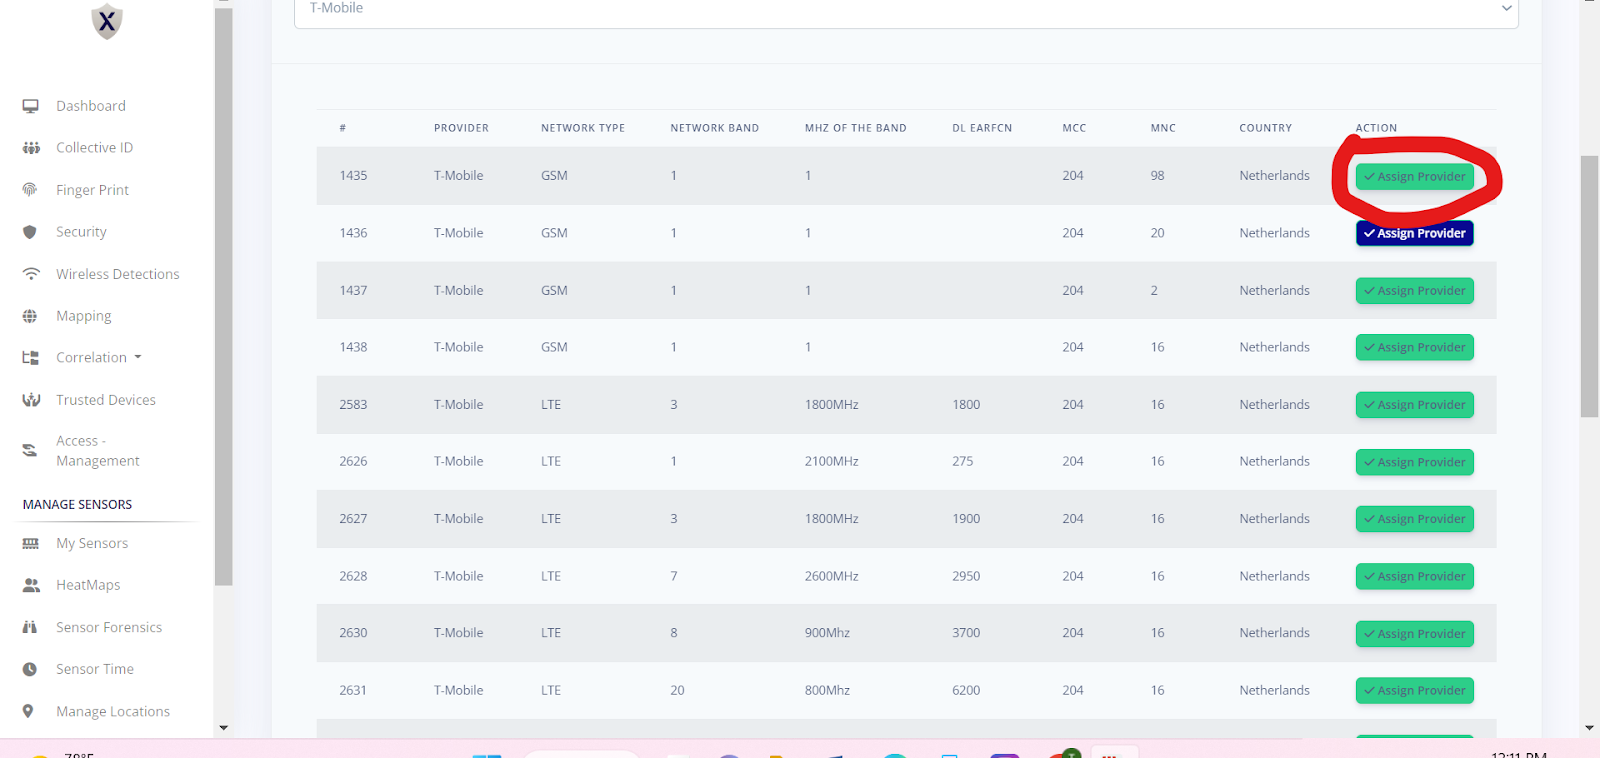
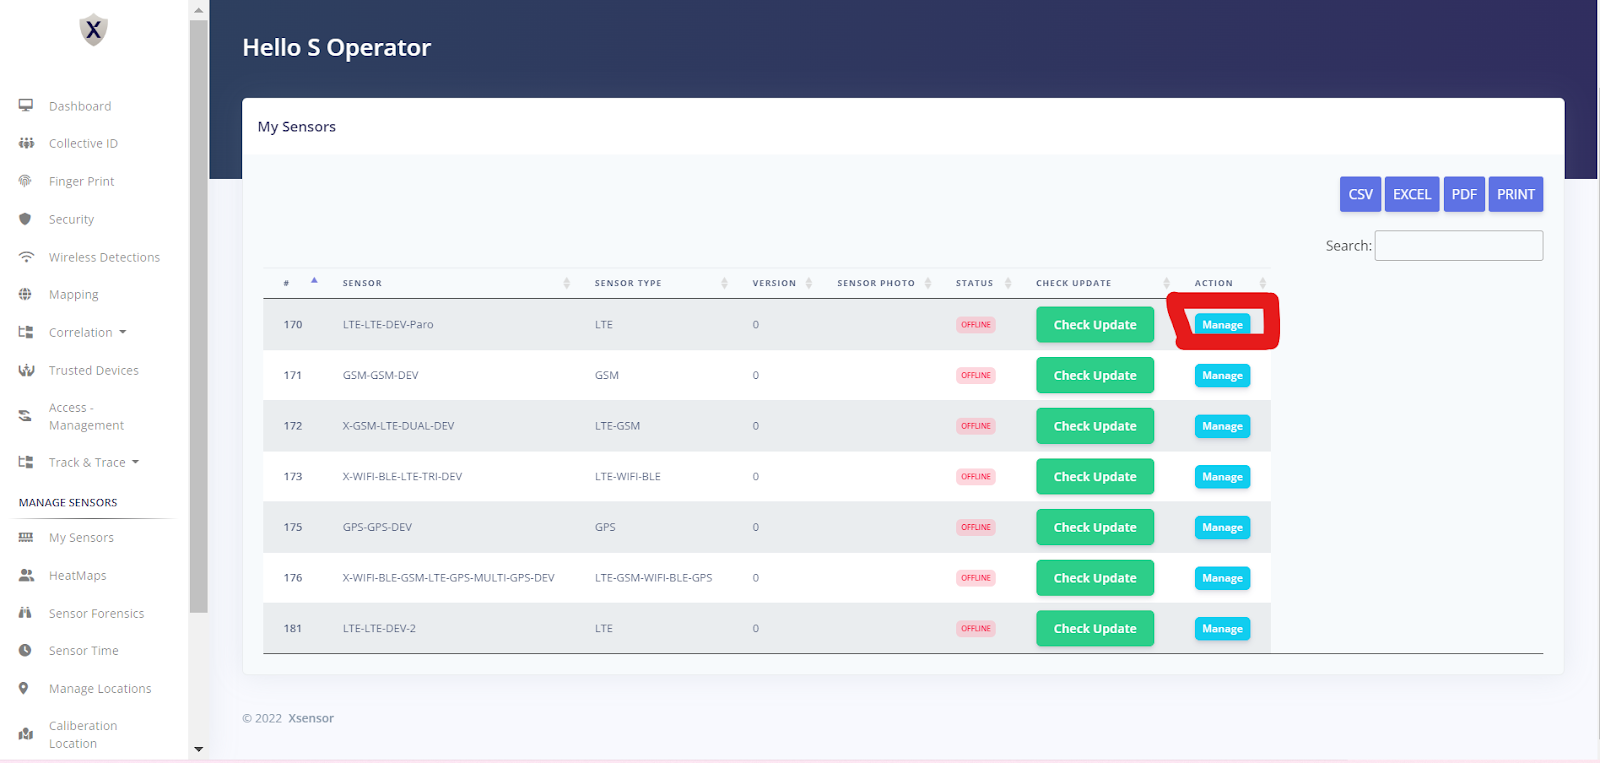
Sensor Management
Who can assign providers to the sensors?
The following user can alter Sensor Management:
Operator
Steps For Sensor Management
-
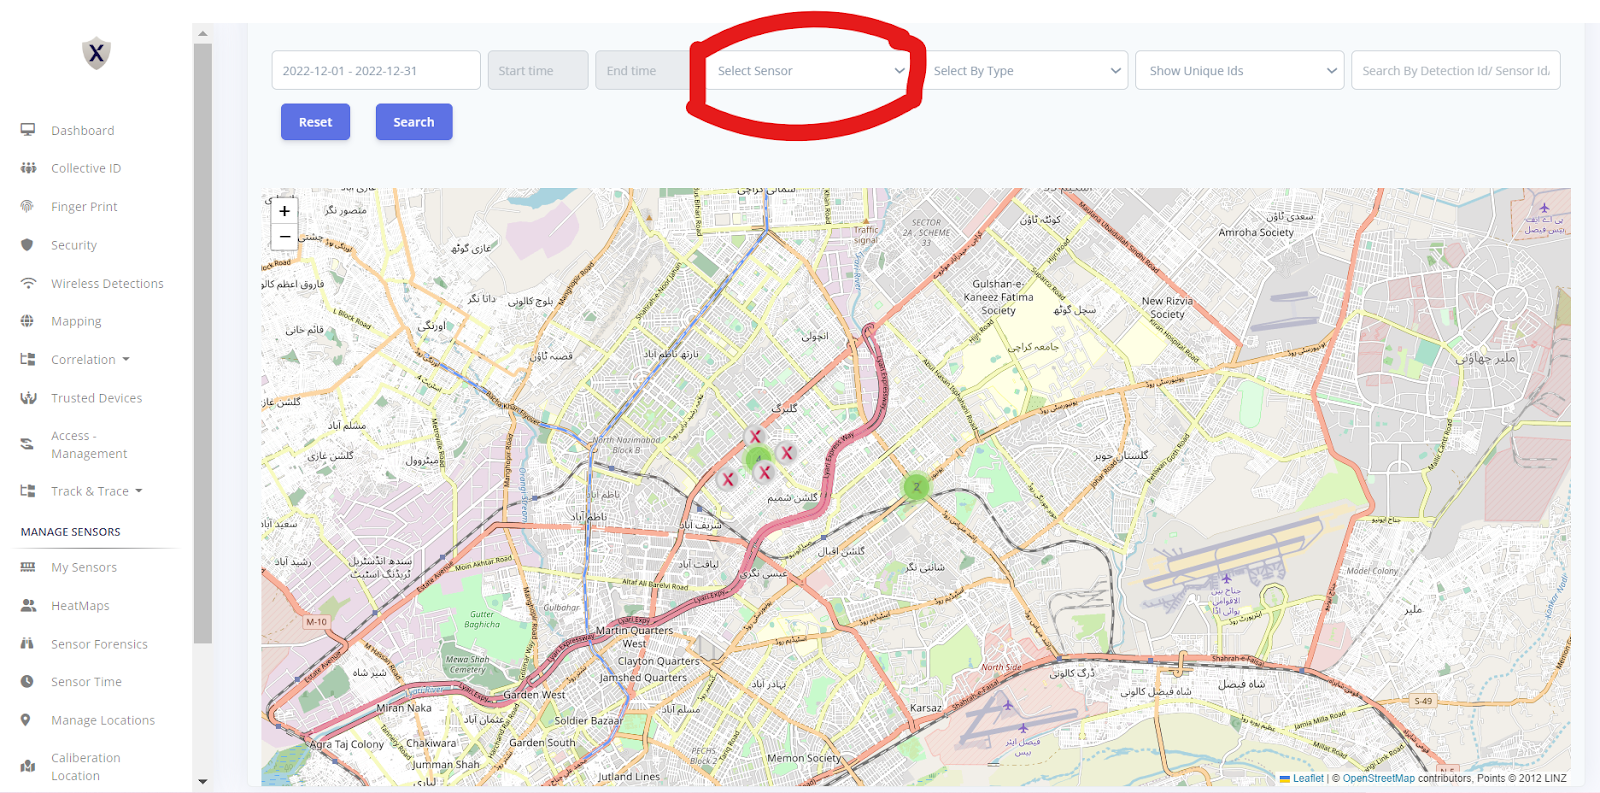
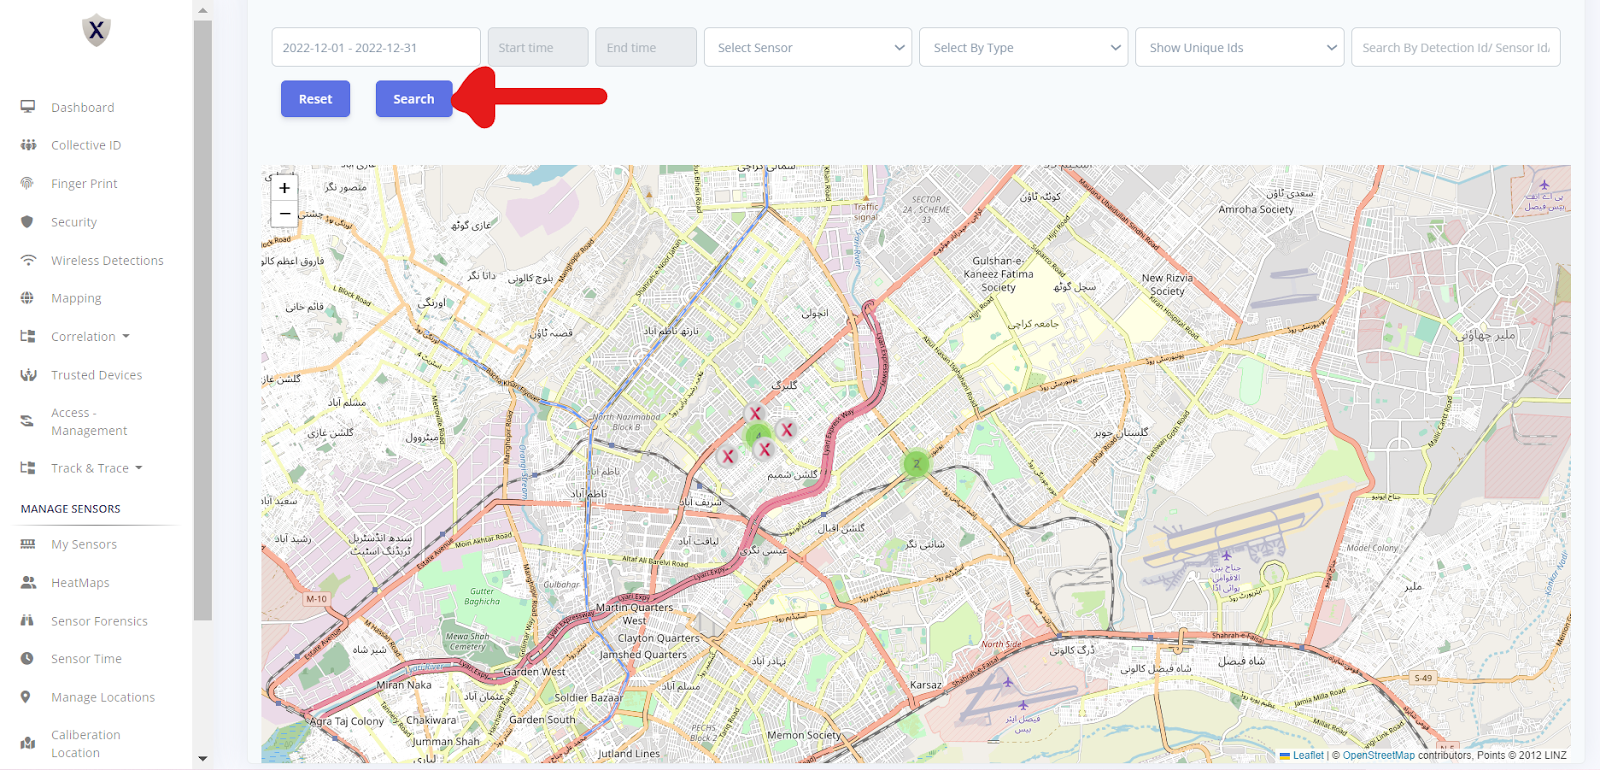
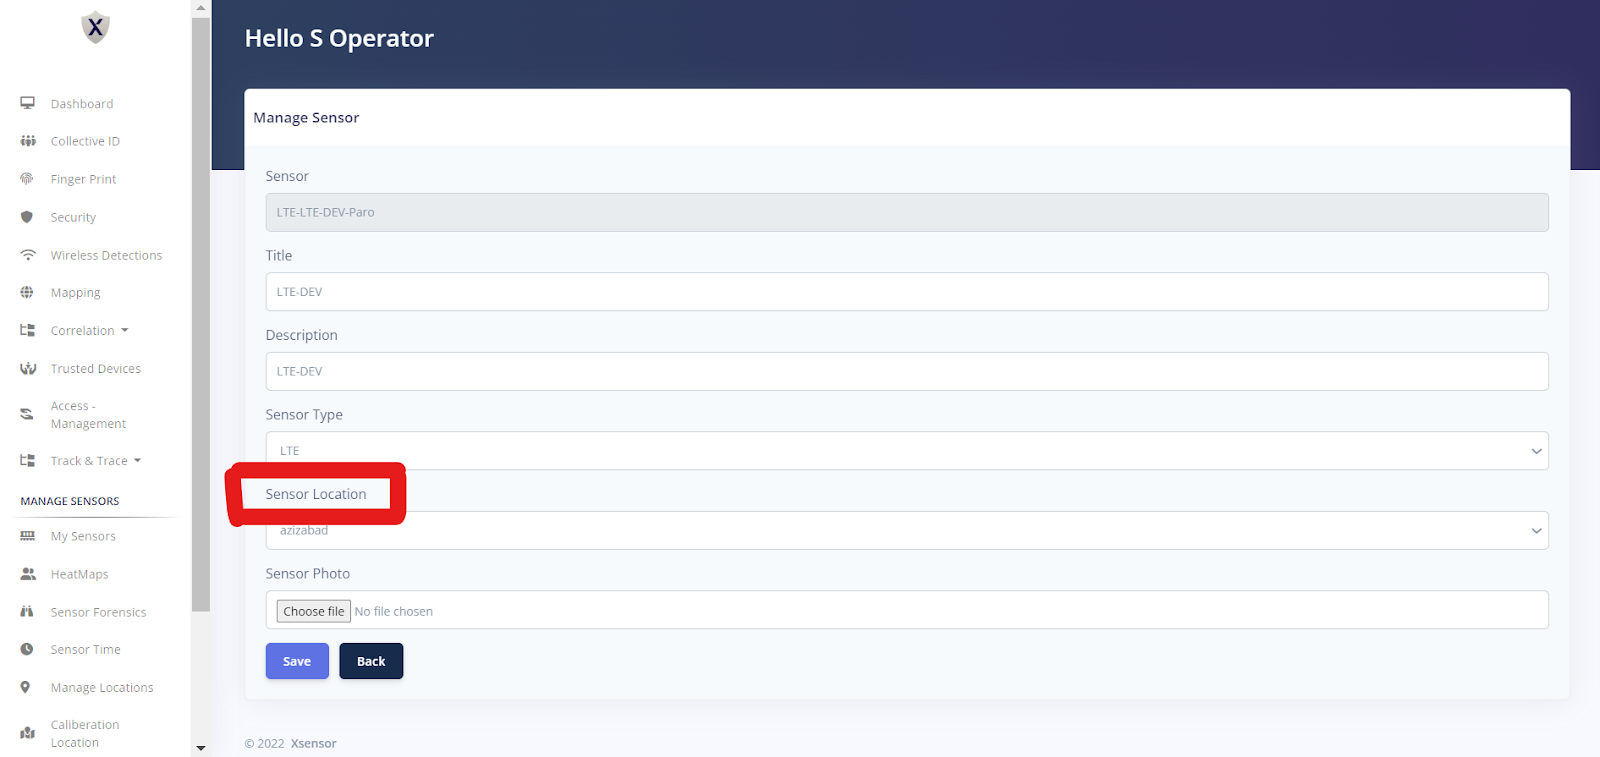
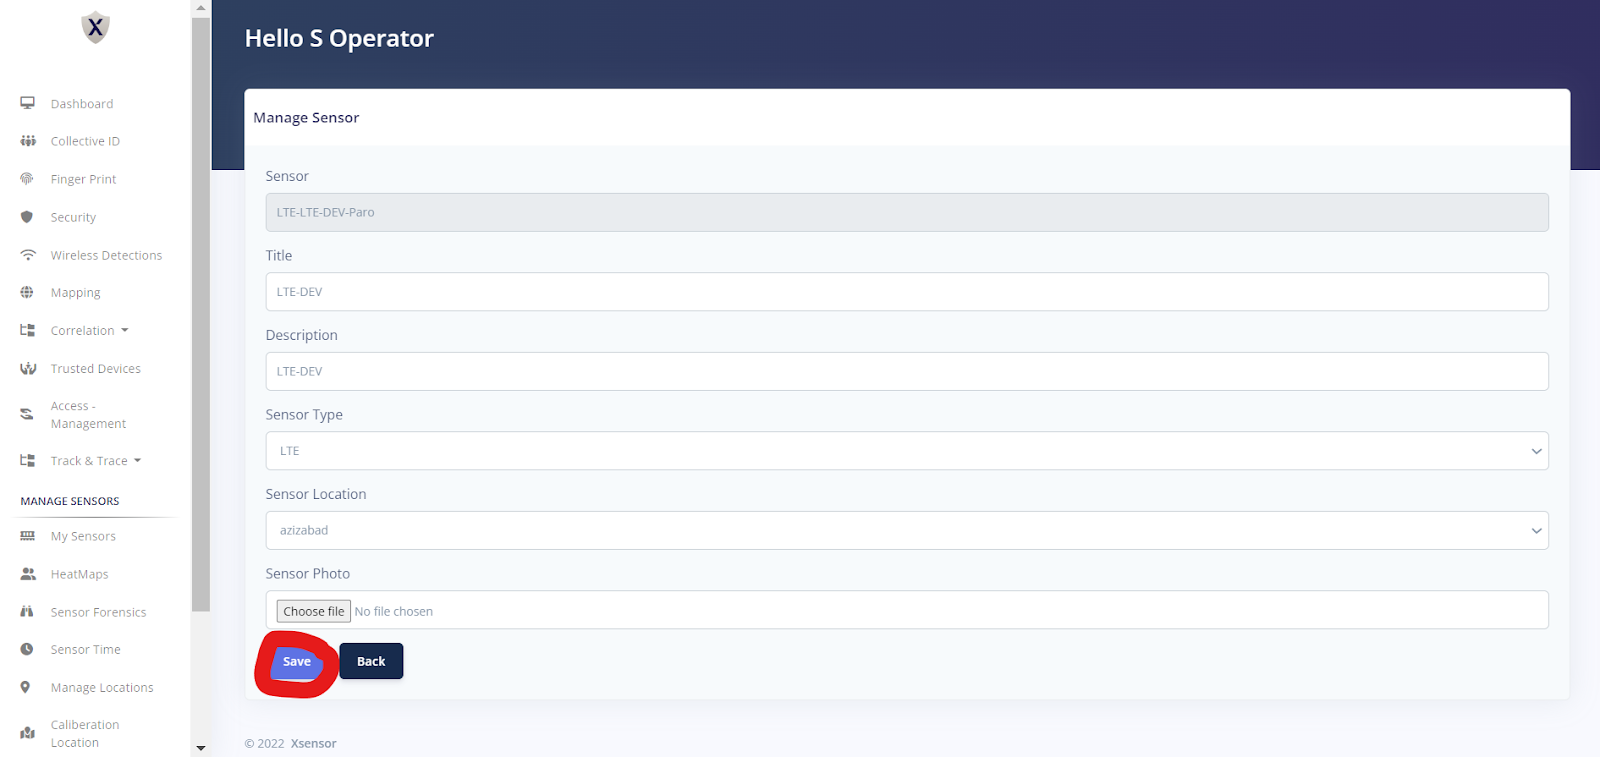
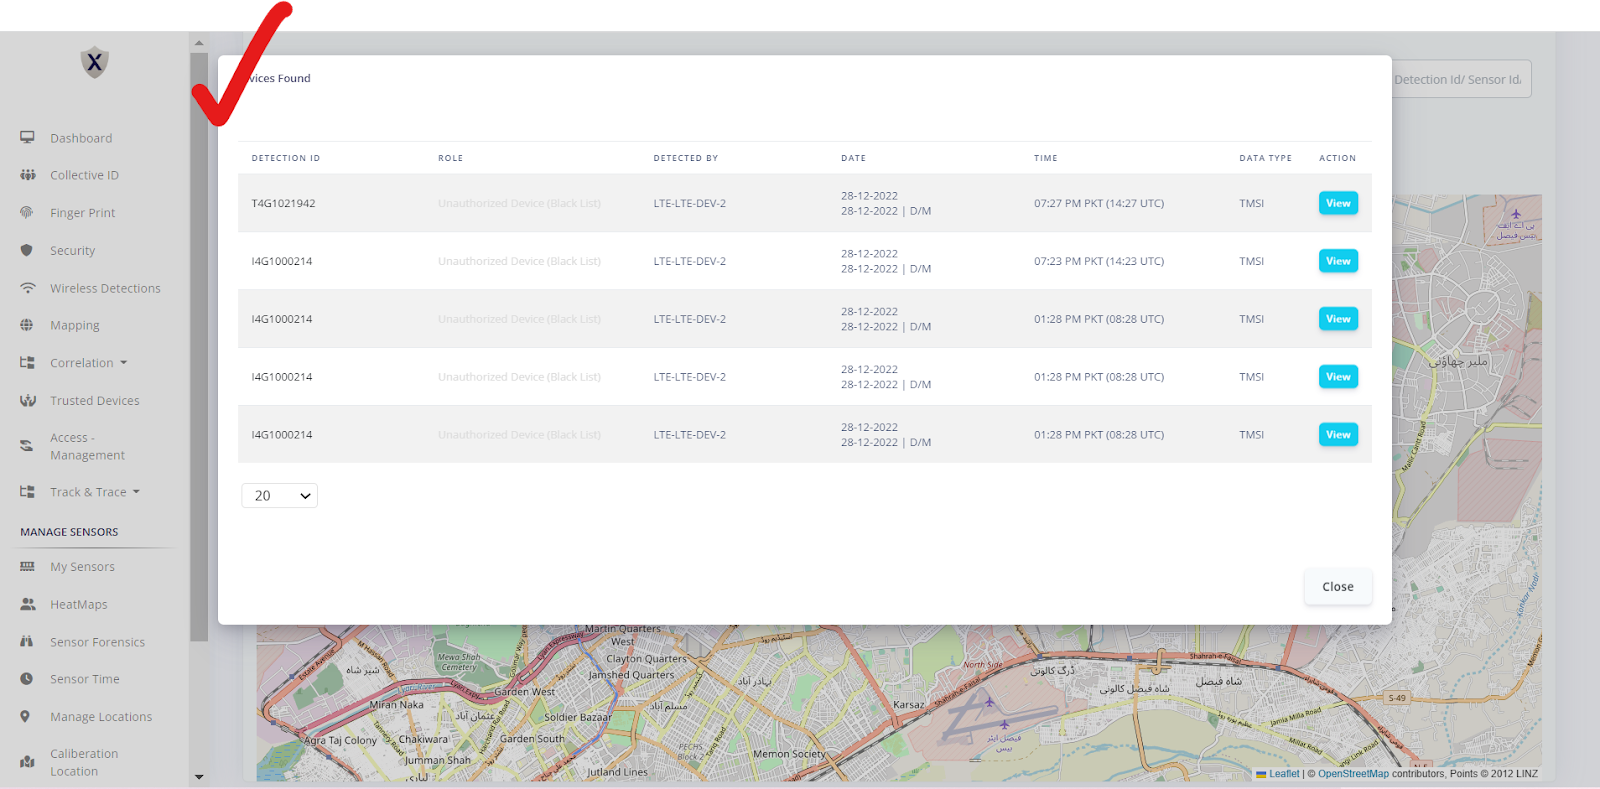
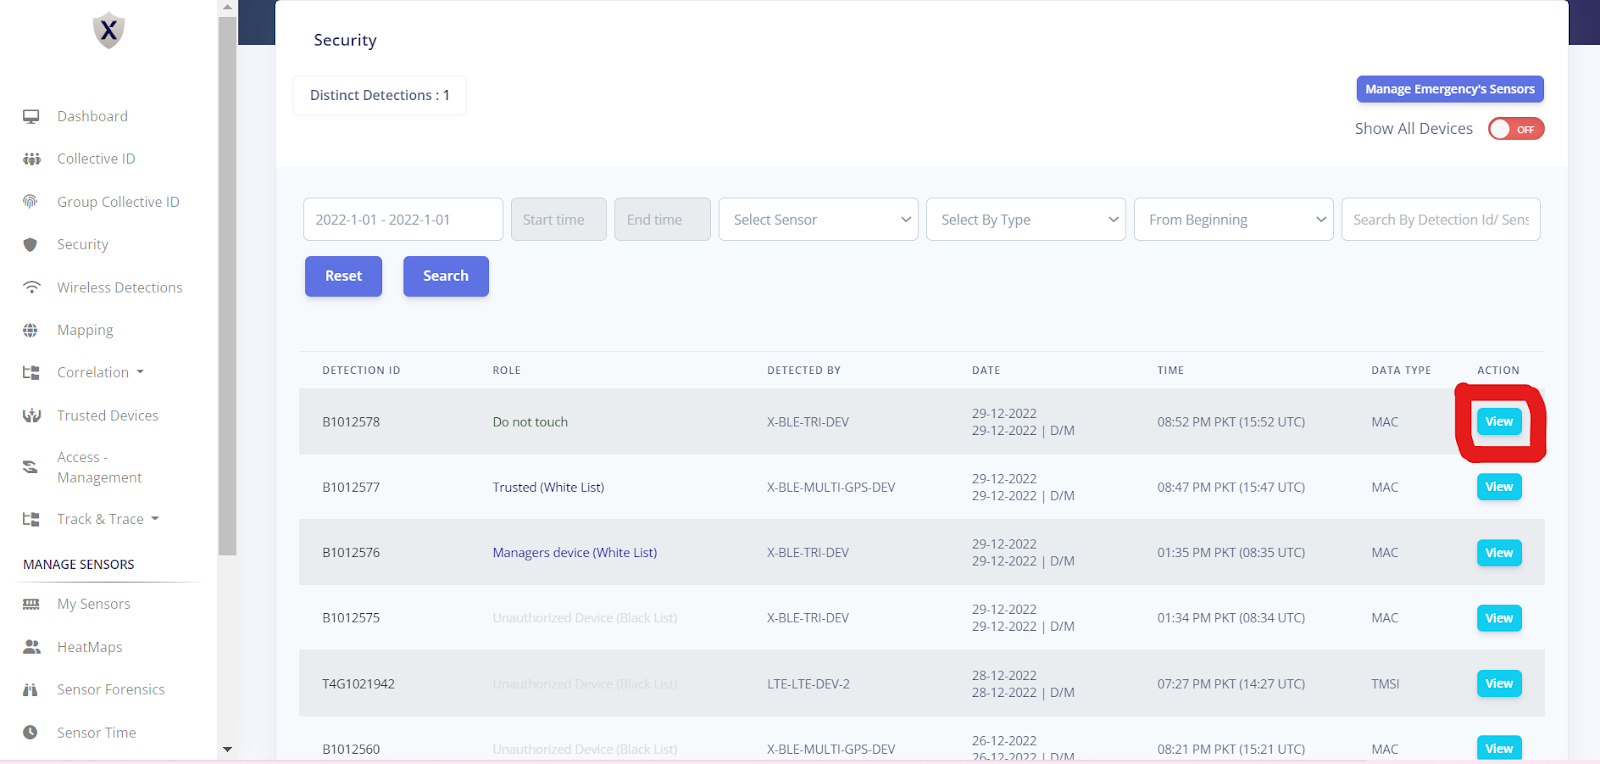
How To Show Sensor On The Mapping Page And Detection Against Sensors?
Show Sensor On The Mapping Page And Detections Against Sensors
Steps For Showing Sensor On The Mapping Page and Detections Against Sensors


COMPANY
-
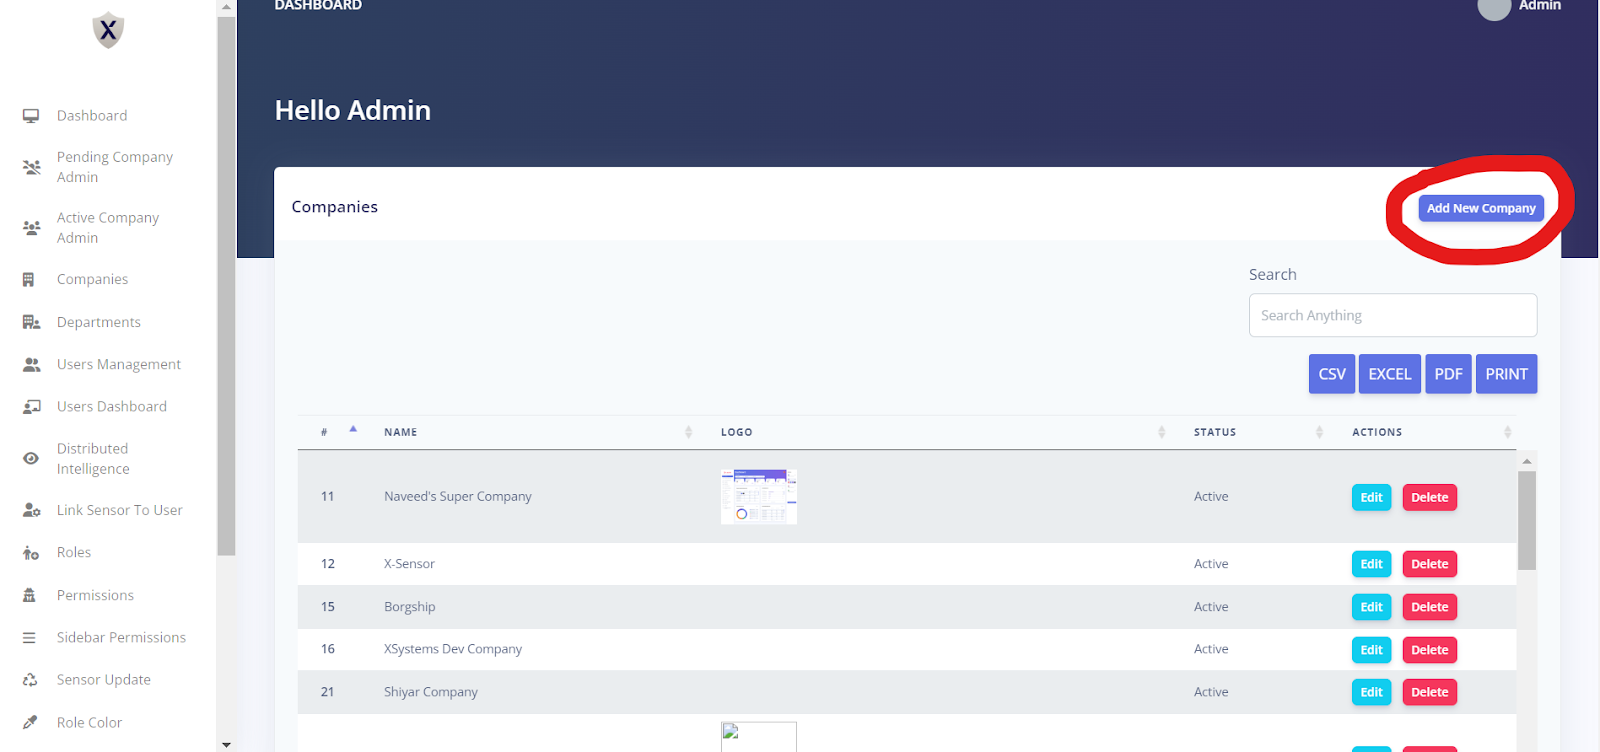
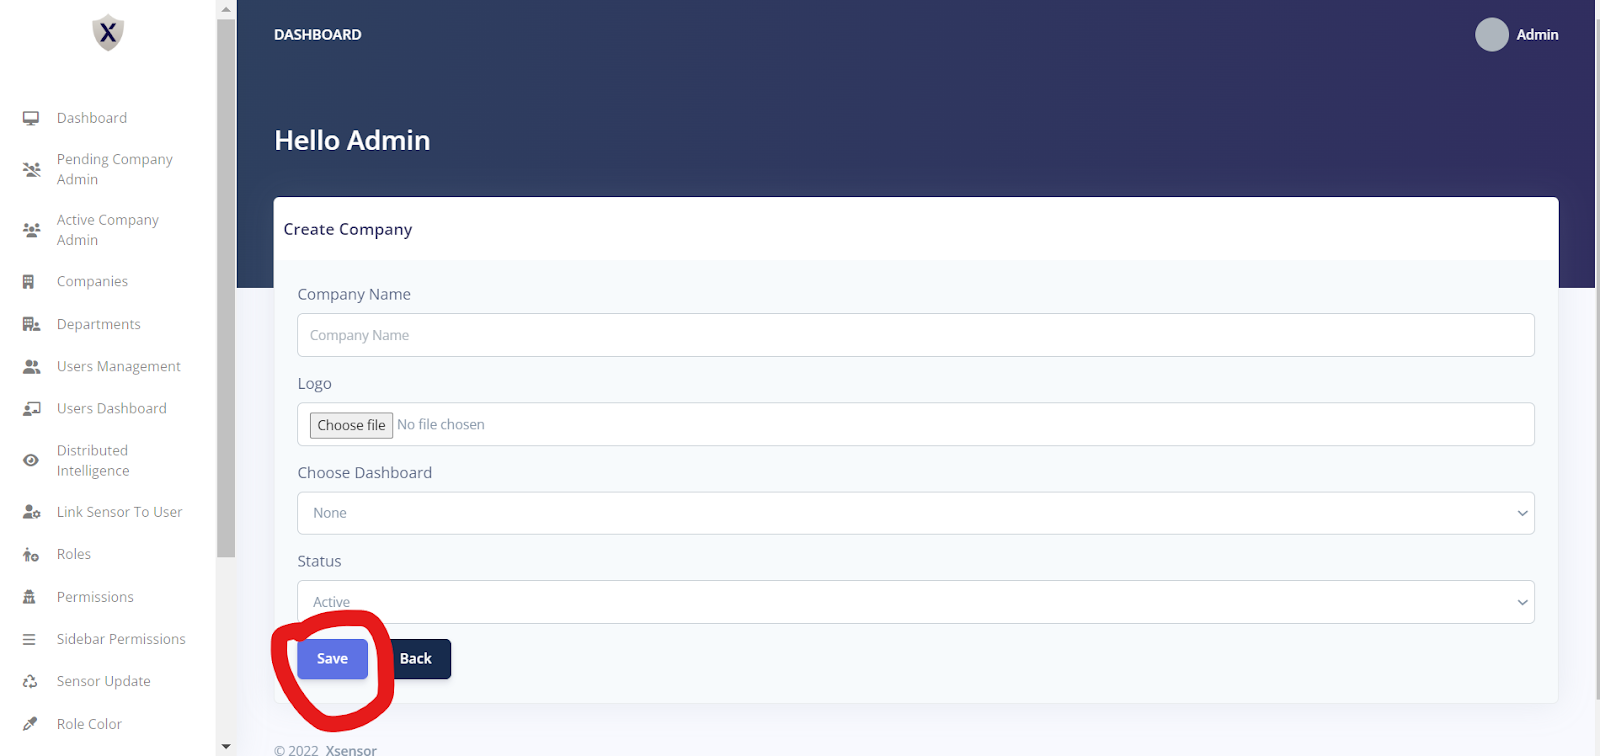
How To Create and Edit A Company?
Create and Edit A Company
Steps For Creating and Editing A Company?
-
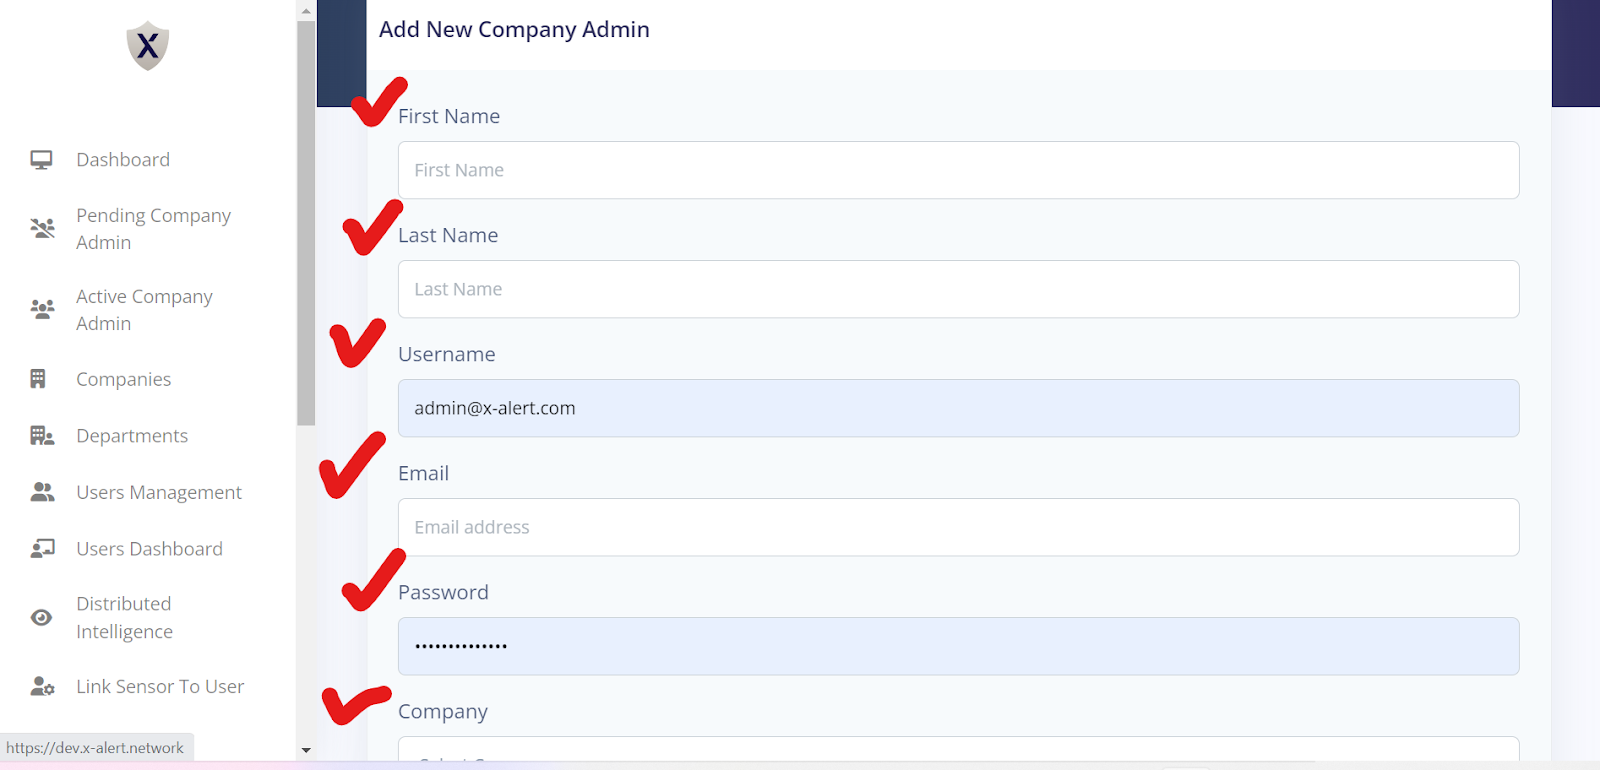
How To Create Company Admin Against Company?
Create Company Admin Against Company
Steps For Creating Company Admin Against Company


DEPARTMENT
-
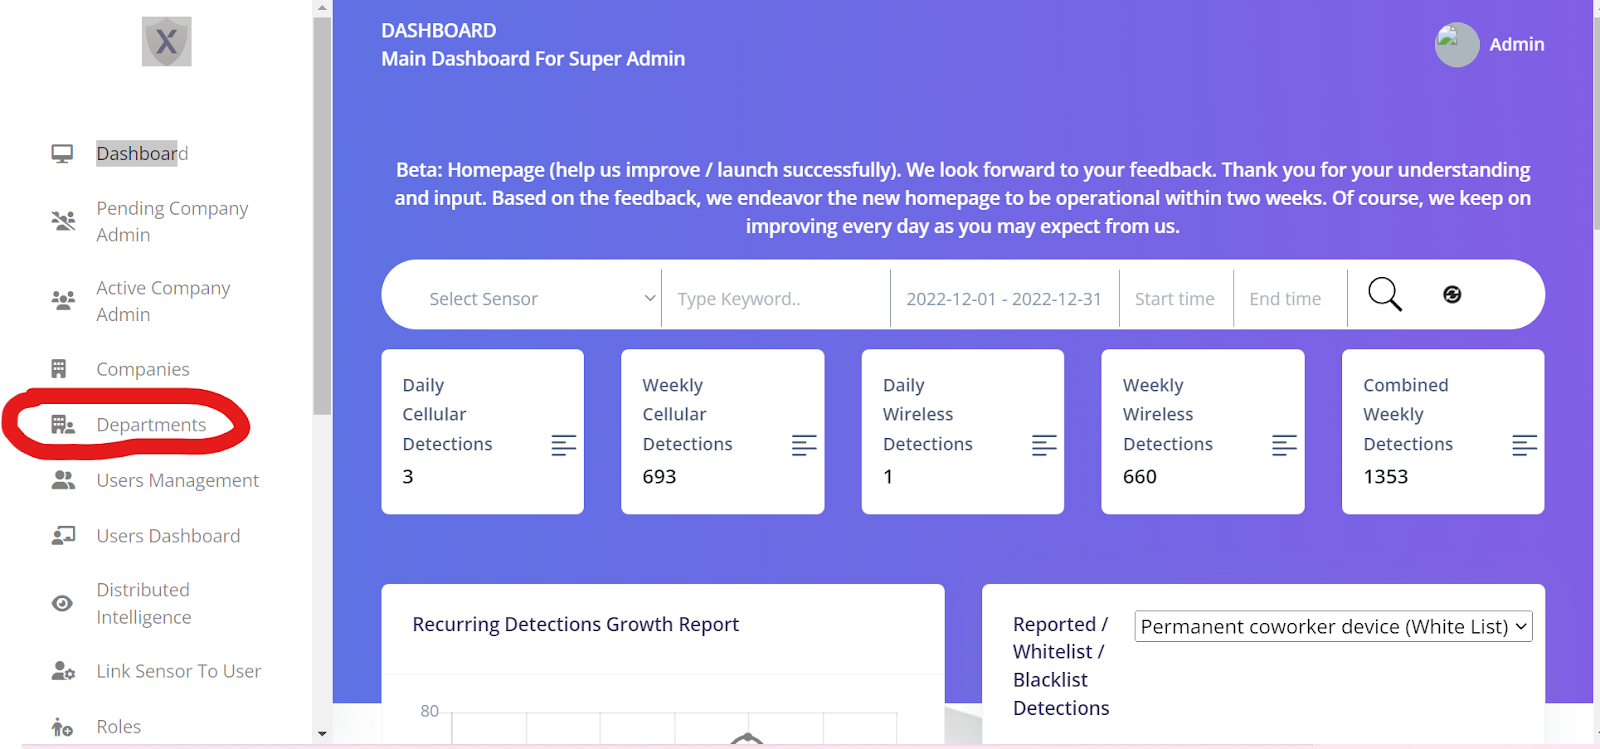
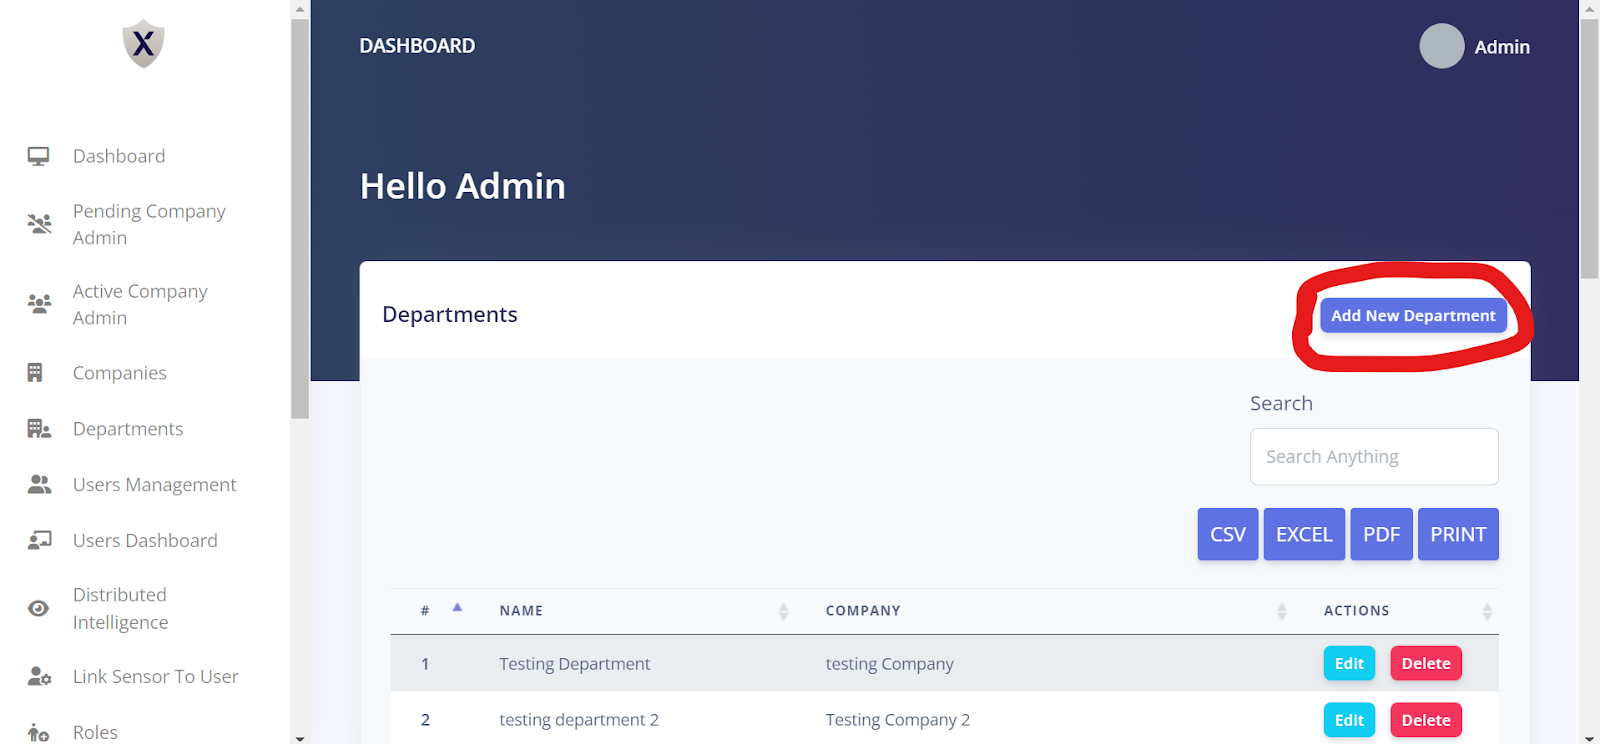
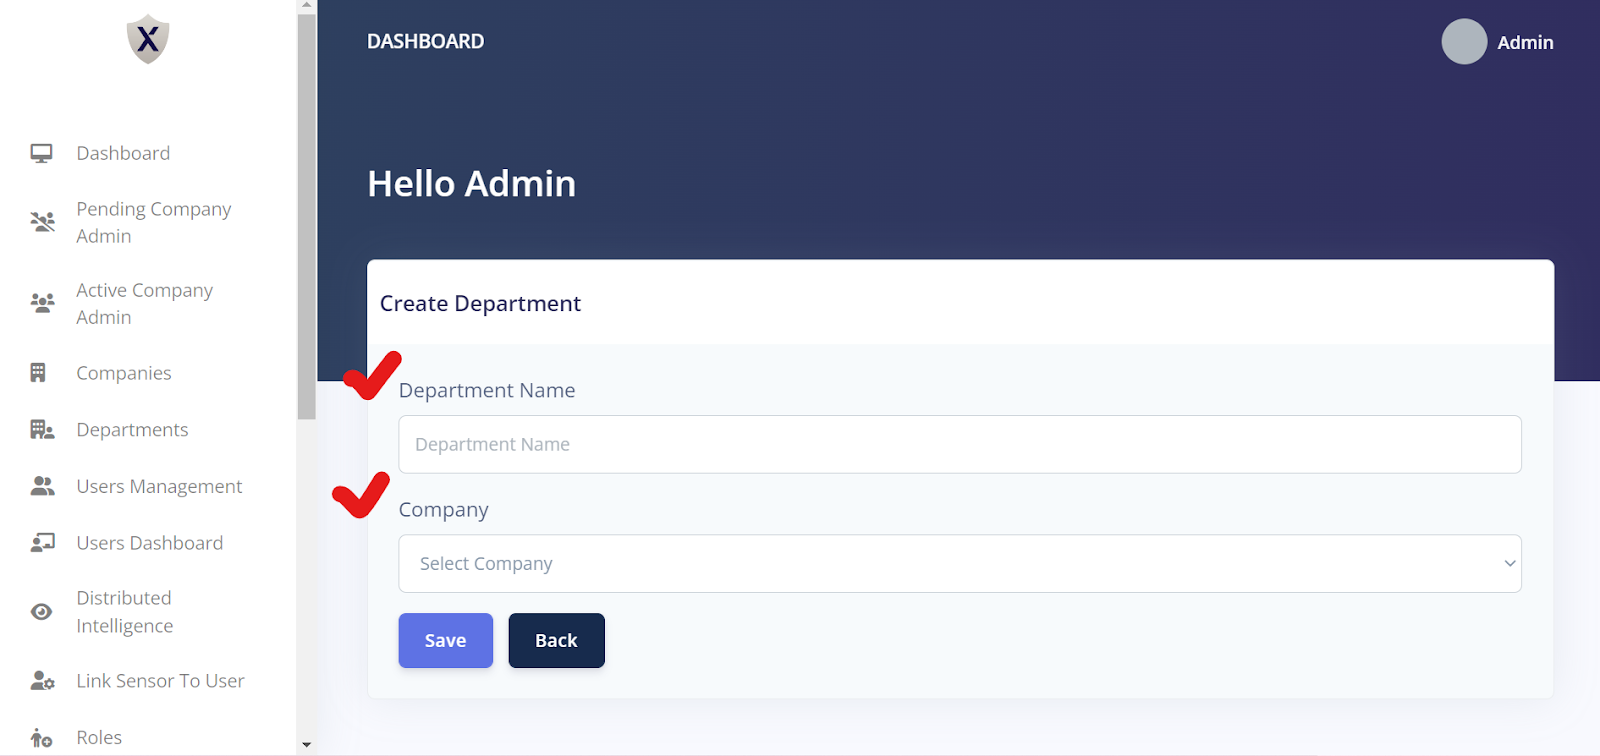
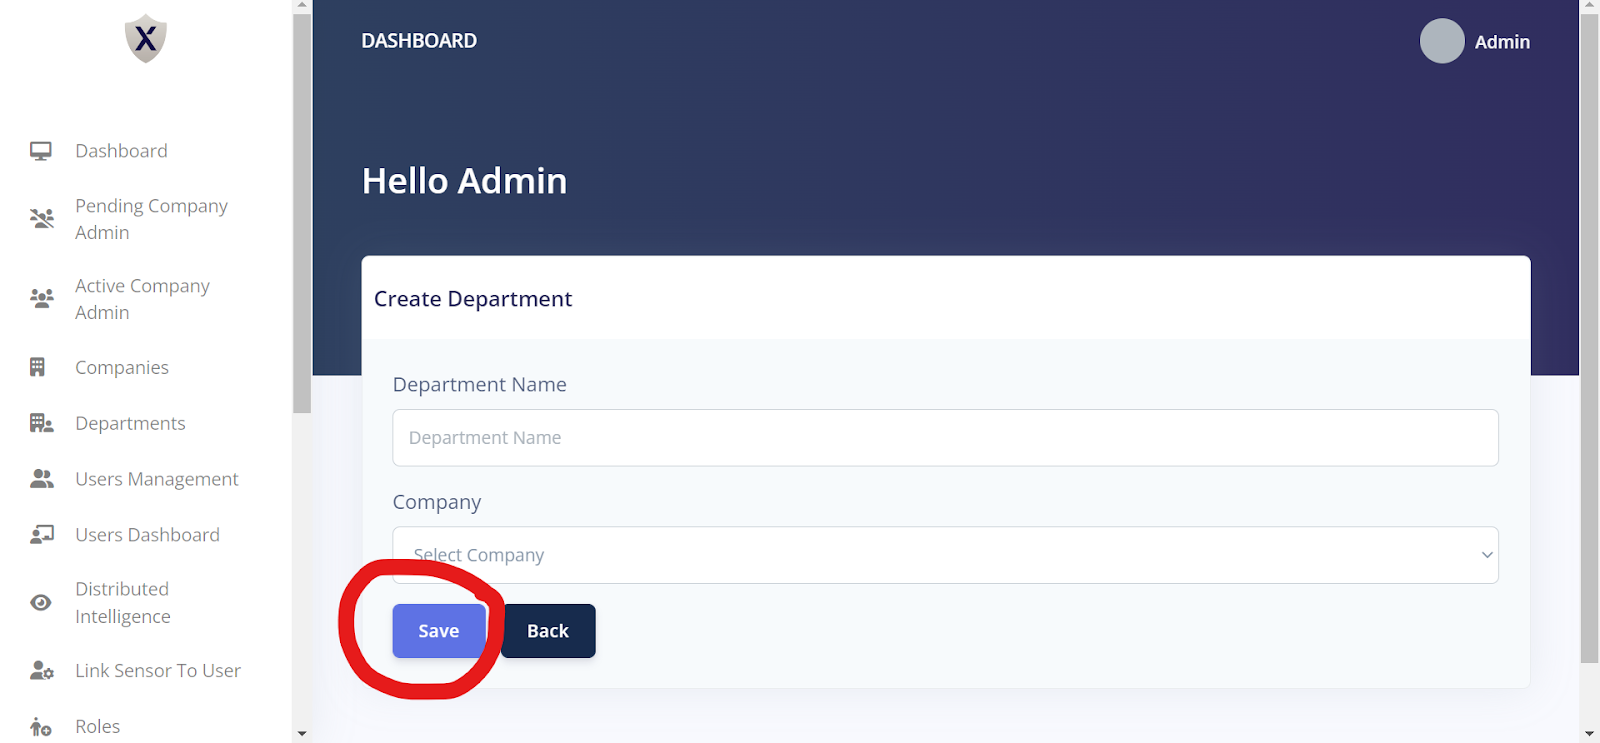
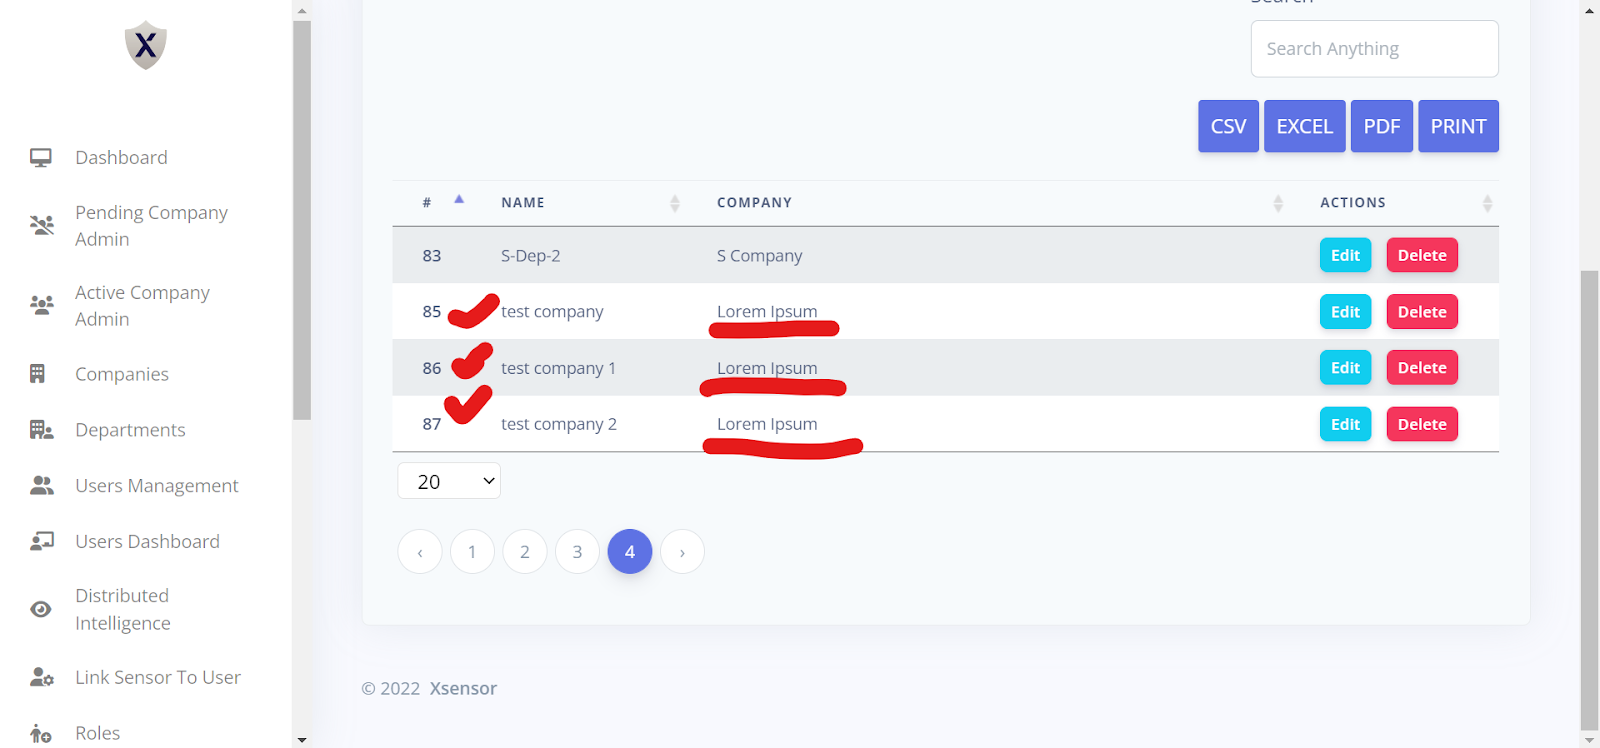
How To Create A Department Against a Company?
Create Department Against Company
Steps For Creating Department Against a Company
-
Create Company Admin Against Company
New FAQ : Answer

COMPANY ADMIN
-
How To Create Company Admin Against Company?
Create Company Admin Against Company
Steps For Creating Company Admin Against Company
ACSESS OF SENSITIVE INFORMATION
-
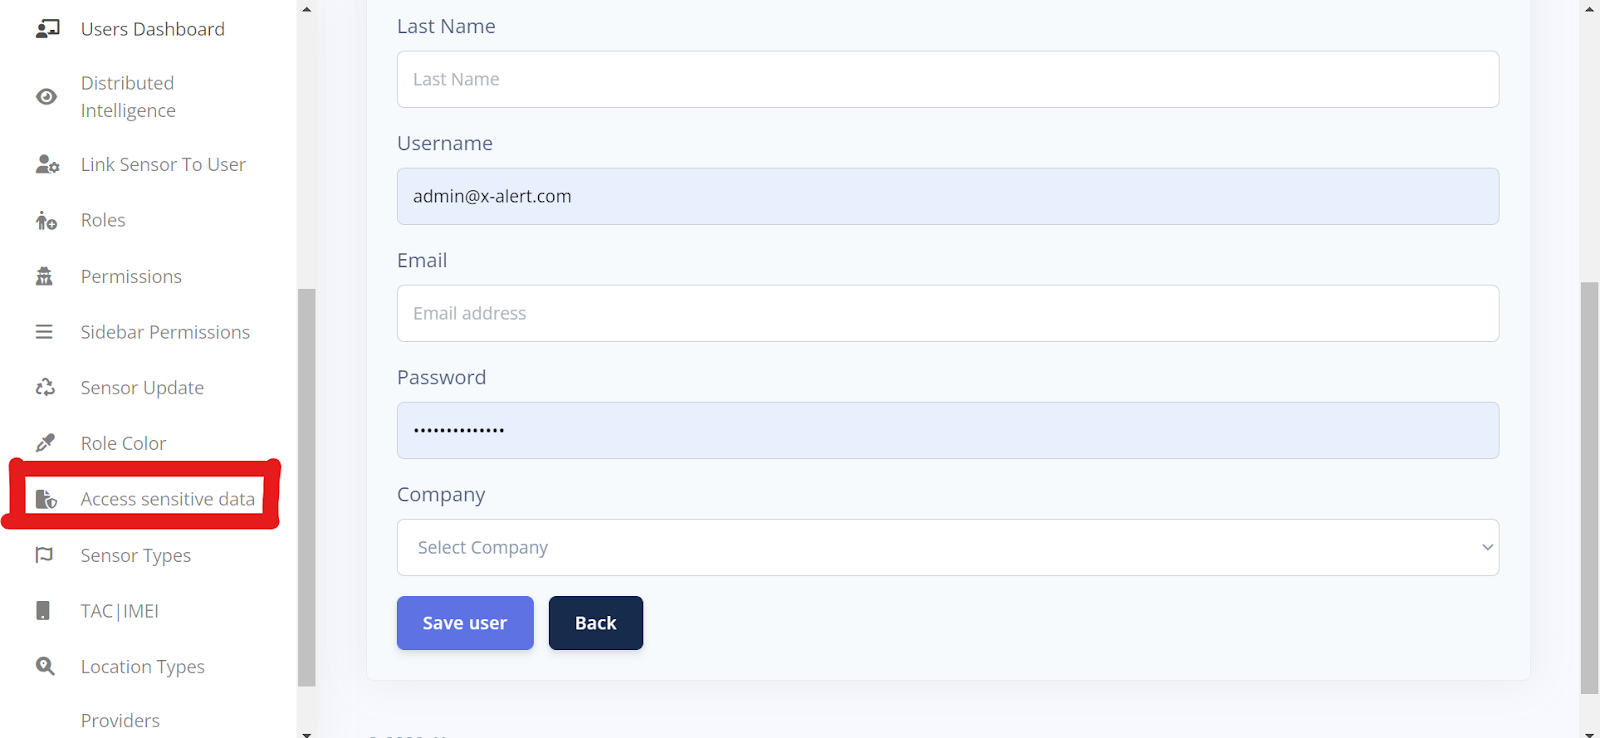
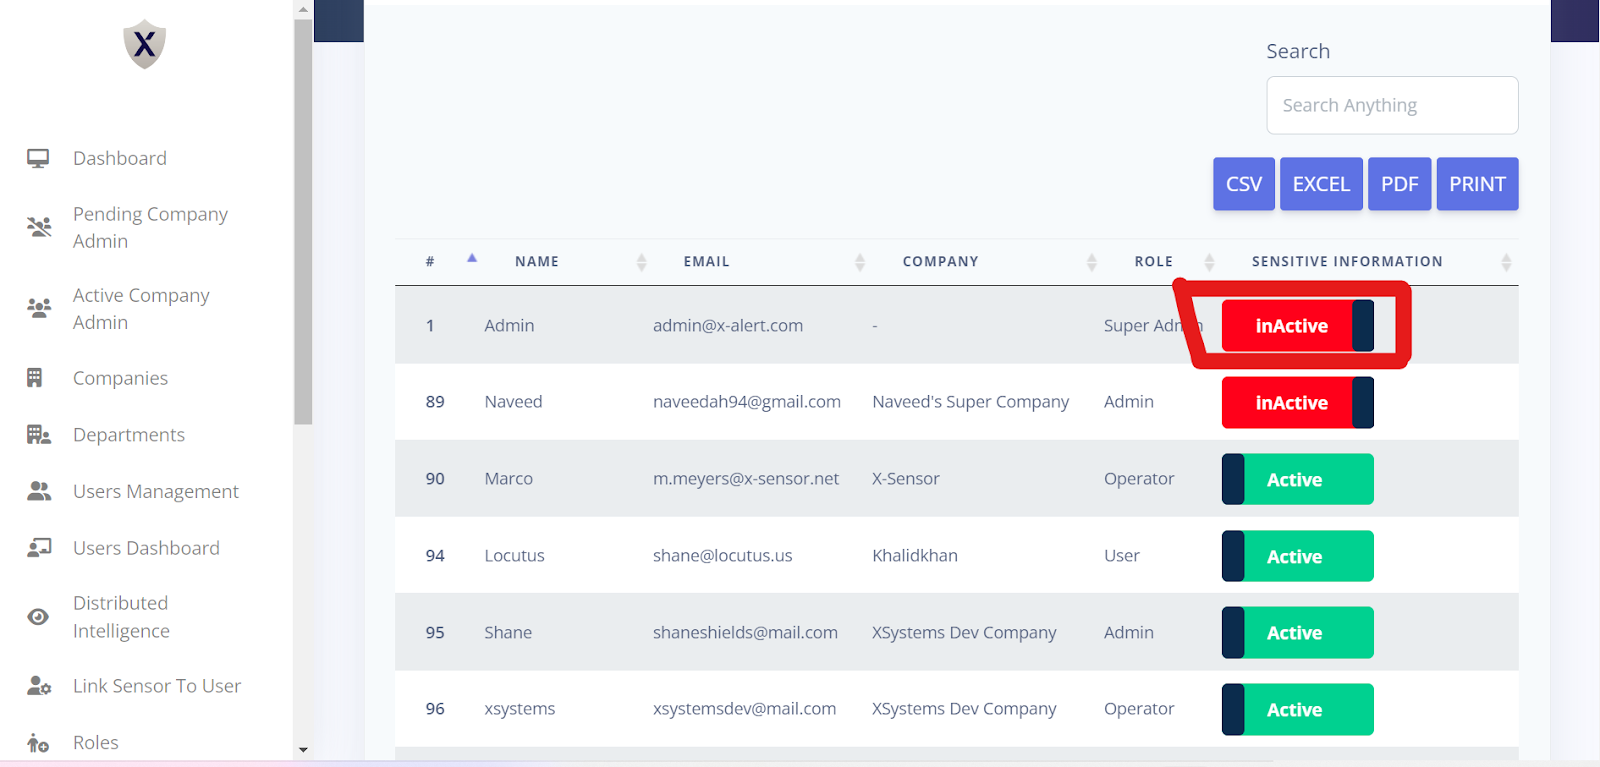
How To Access Sensitive Data?
Access Sensitive Data
Steps For Accessing Sensitive Data


NEW USER
-
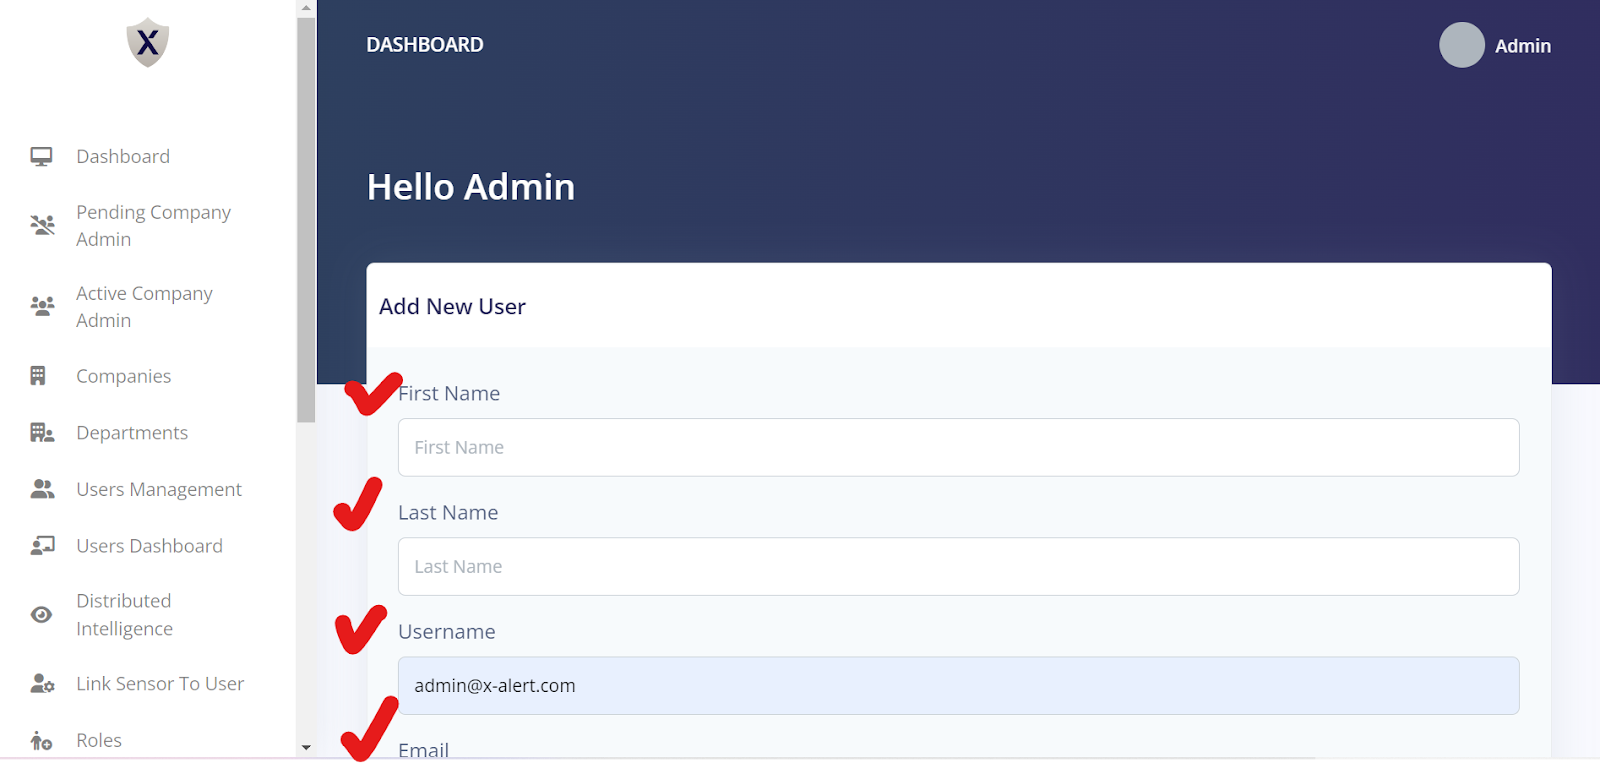
How To Create A New User Against Company And Department?
Create A New User Against Company And Department
Steps For Creating a new user against Company and department


DASHBOARD
-
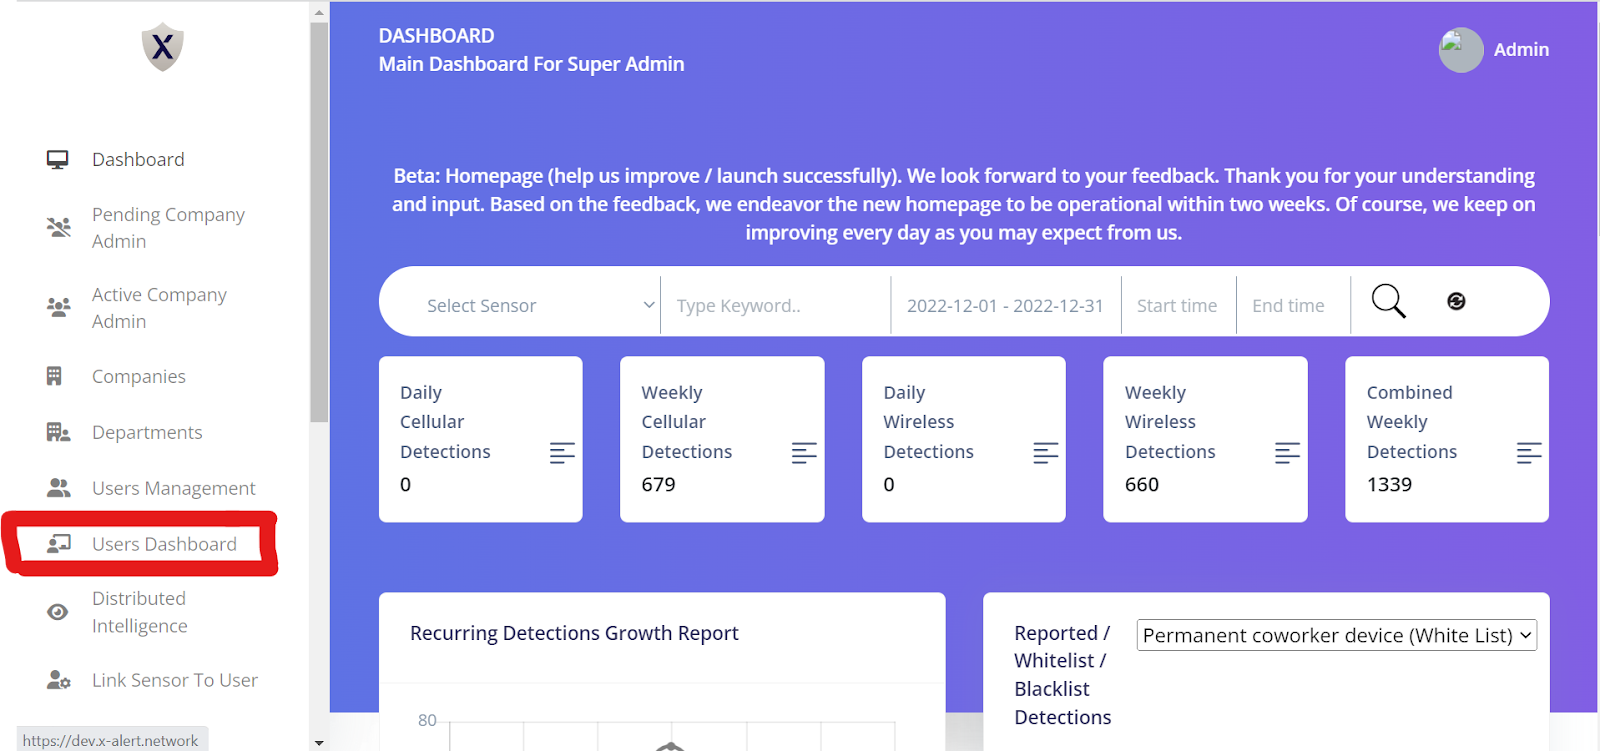
How To Assign Different Dashboard To Users?
Assign Different Dashboard To Users
Steps For Assigning Different Dashboard To Users


LOCATION
-
How To Create New Location and Assign It To Sensor?
Create New Location and Assign it to the Sensor.
Steps For Creating New Location and Assigning it to the sensor


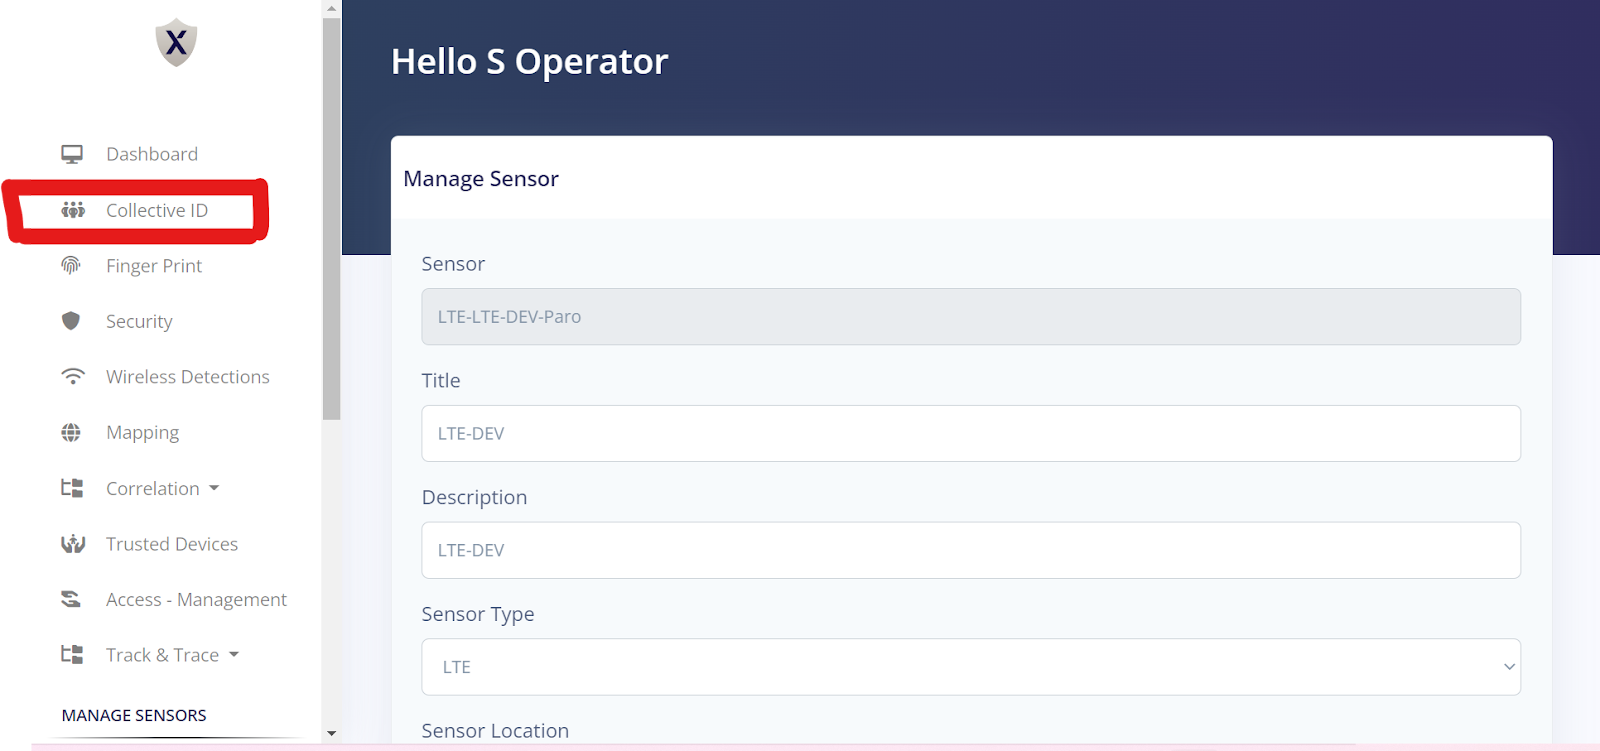
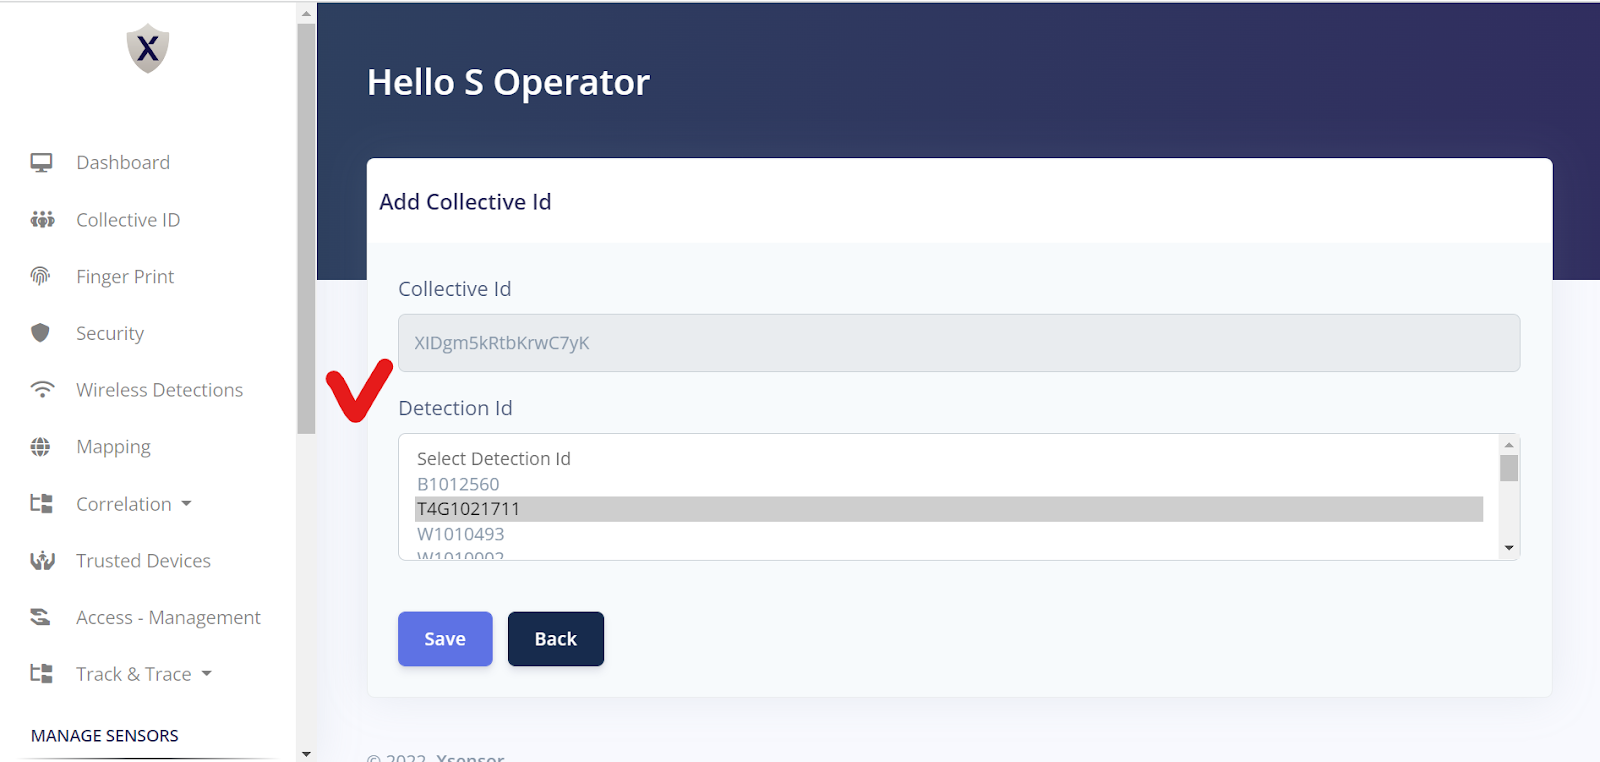
COLLECTIVE ID AND FINGERPRINTS
-
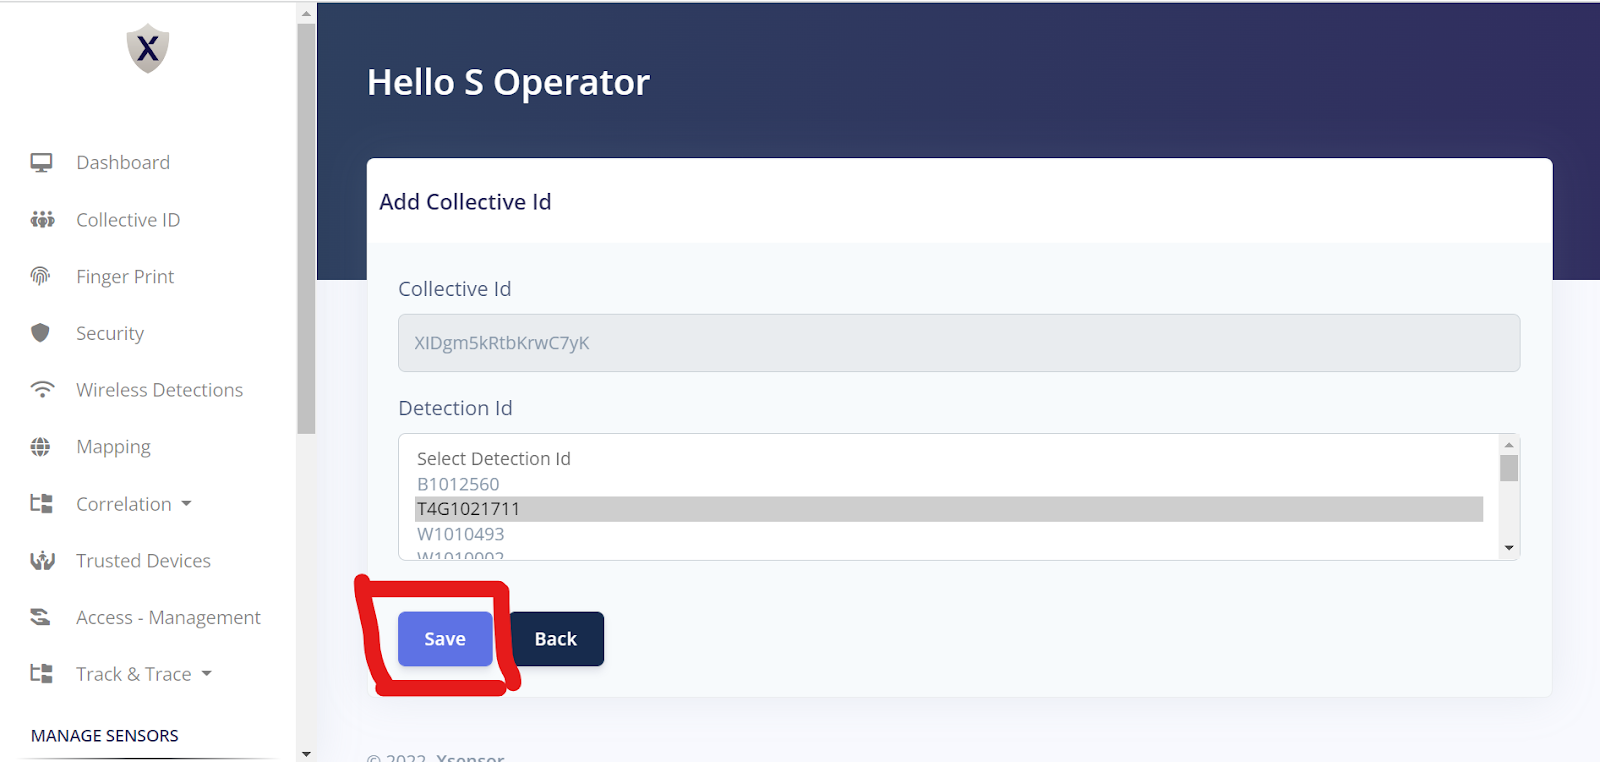
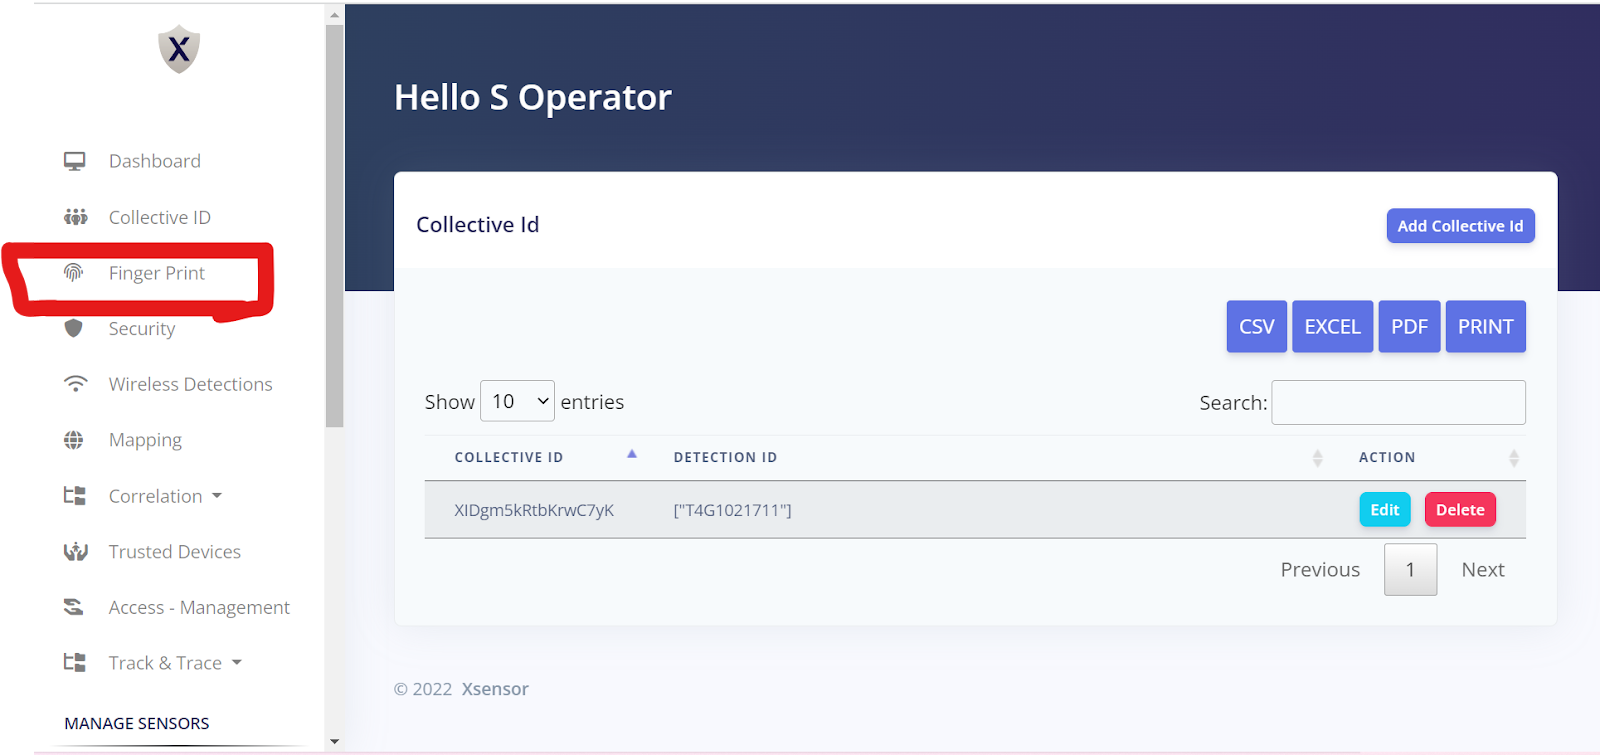
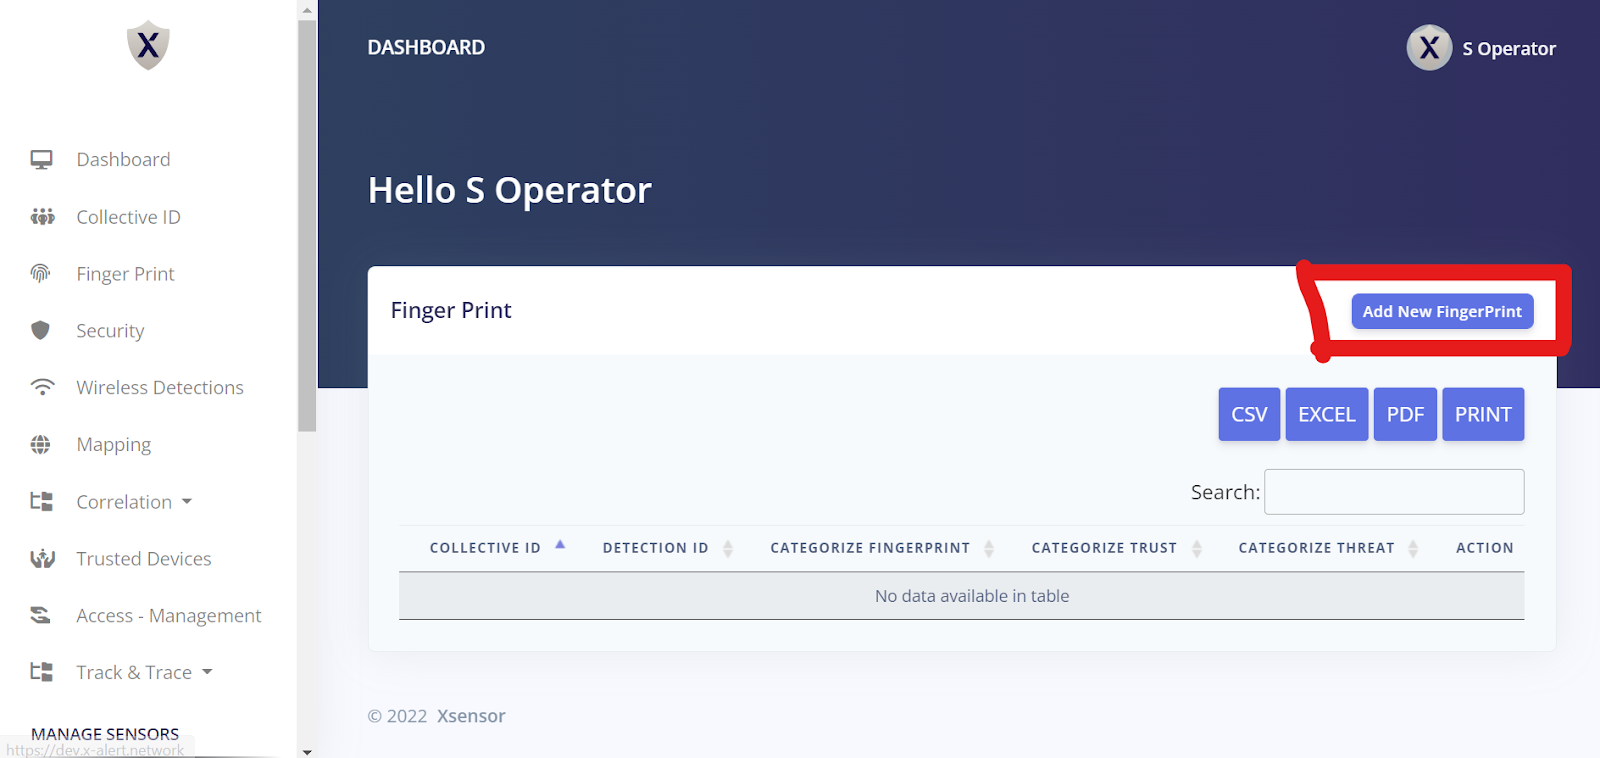
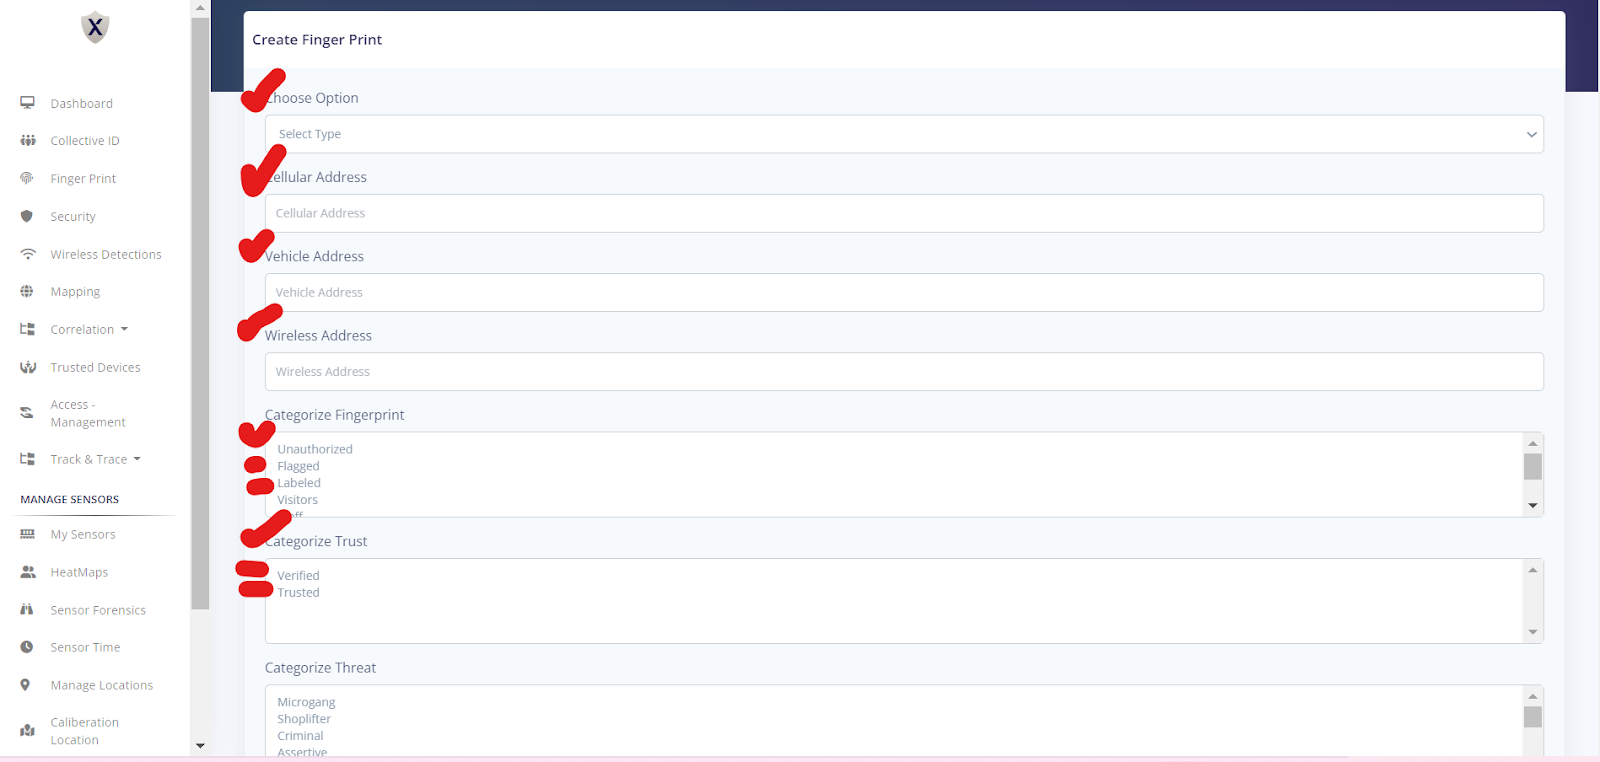
How To Create Finger Print and Collective Against Detection IDs?
Create Finger Print and Collective Against Detection IDs
Steps For Creating Finger Print and Collective Against Detection IDs


DISTRIBUTED INTELLIGENCE
-
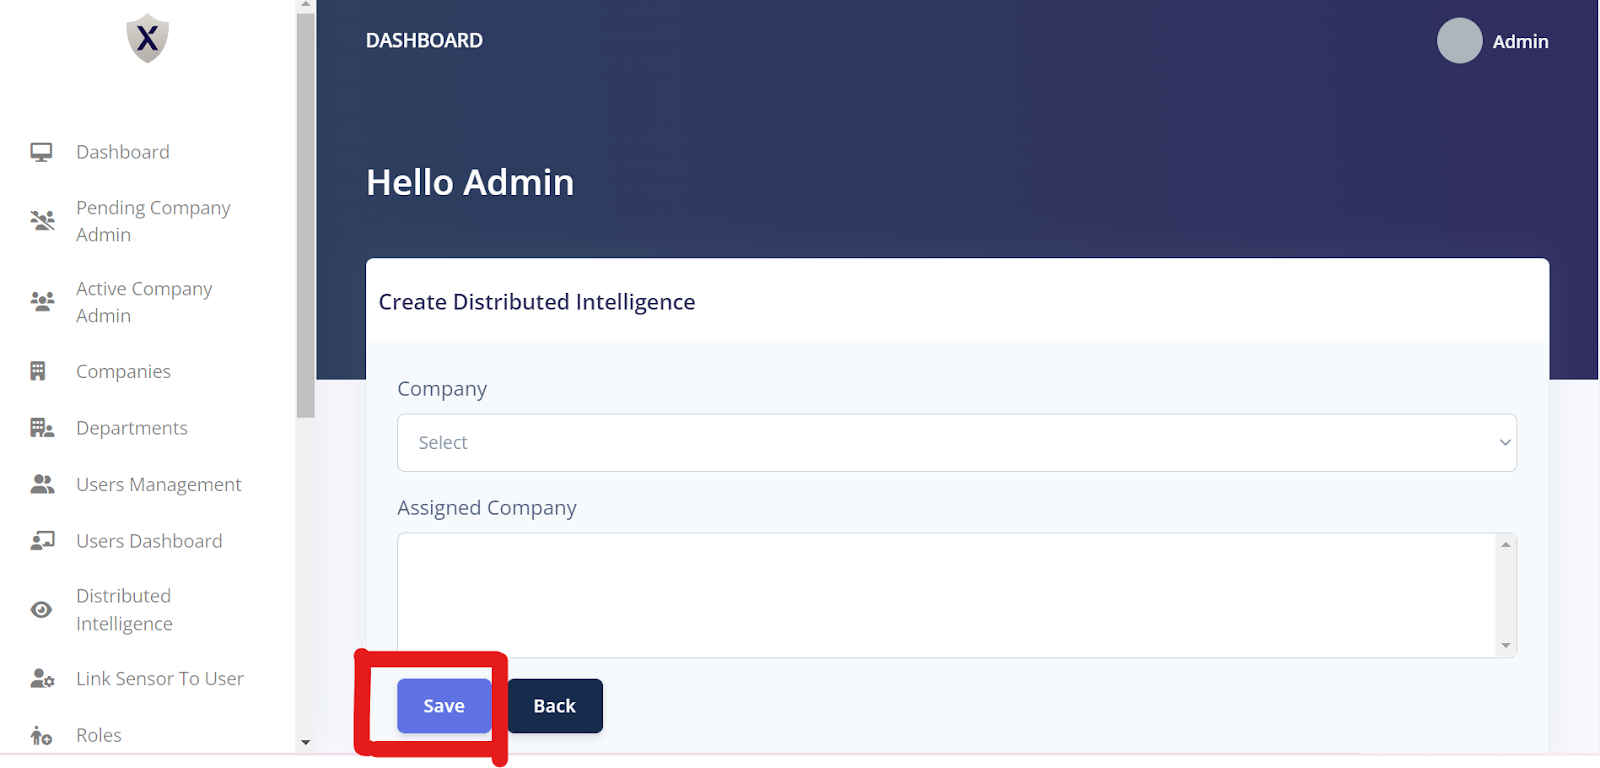
How Can We Use Distributed Intelligence To Show The Company To Company Detection Data?
Distributed Intelligence To Show The Company To Company Detection Data
Steps For Showing Company to Company Detections Data


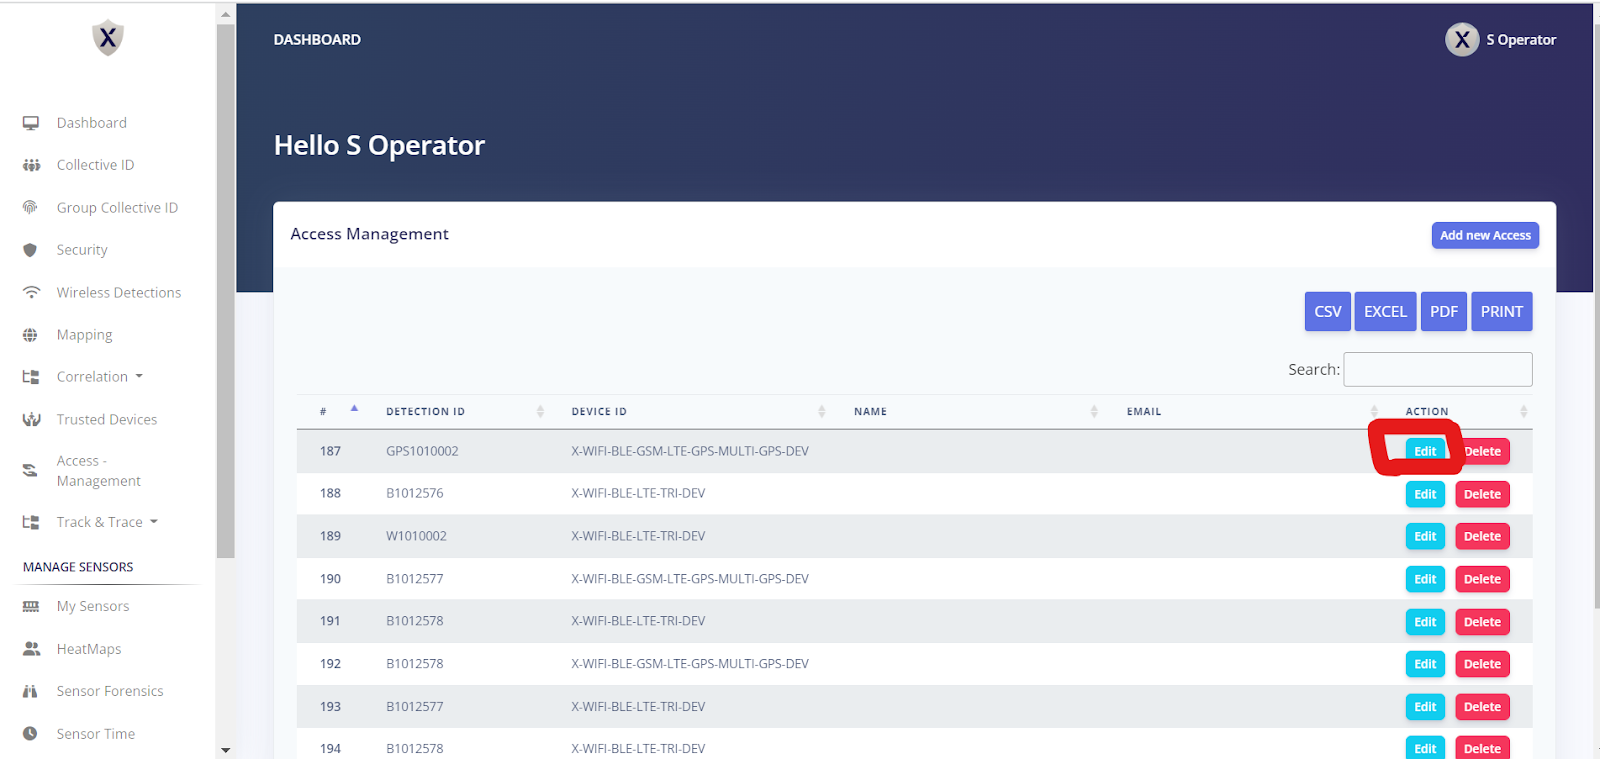
ACCESS MANAGEMENT
-
What Are The Steps For Access Management?
Access Management
Steps For Access Management


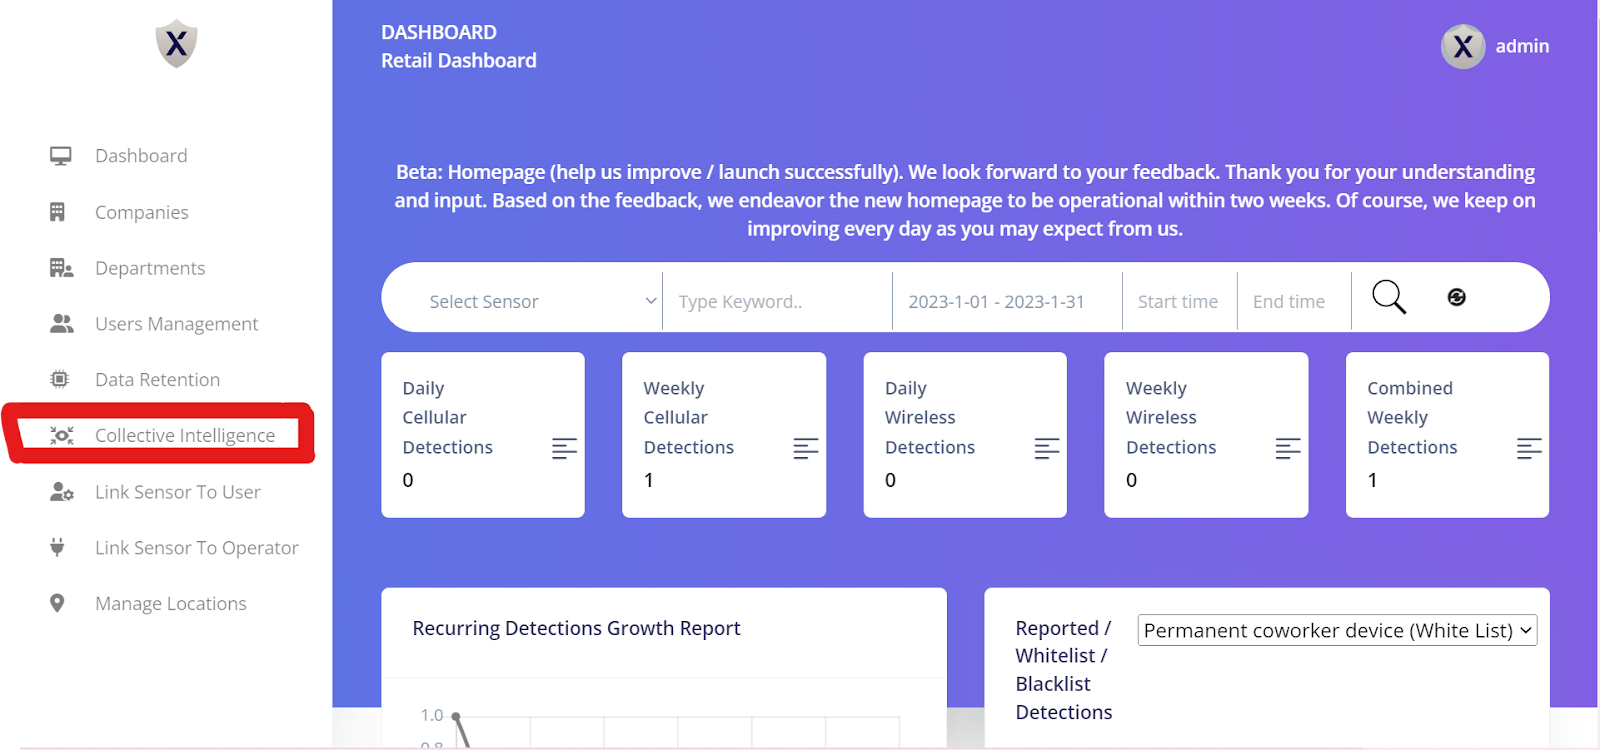
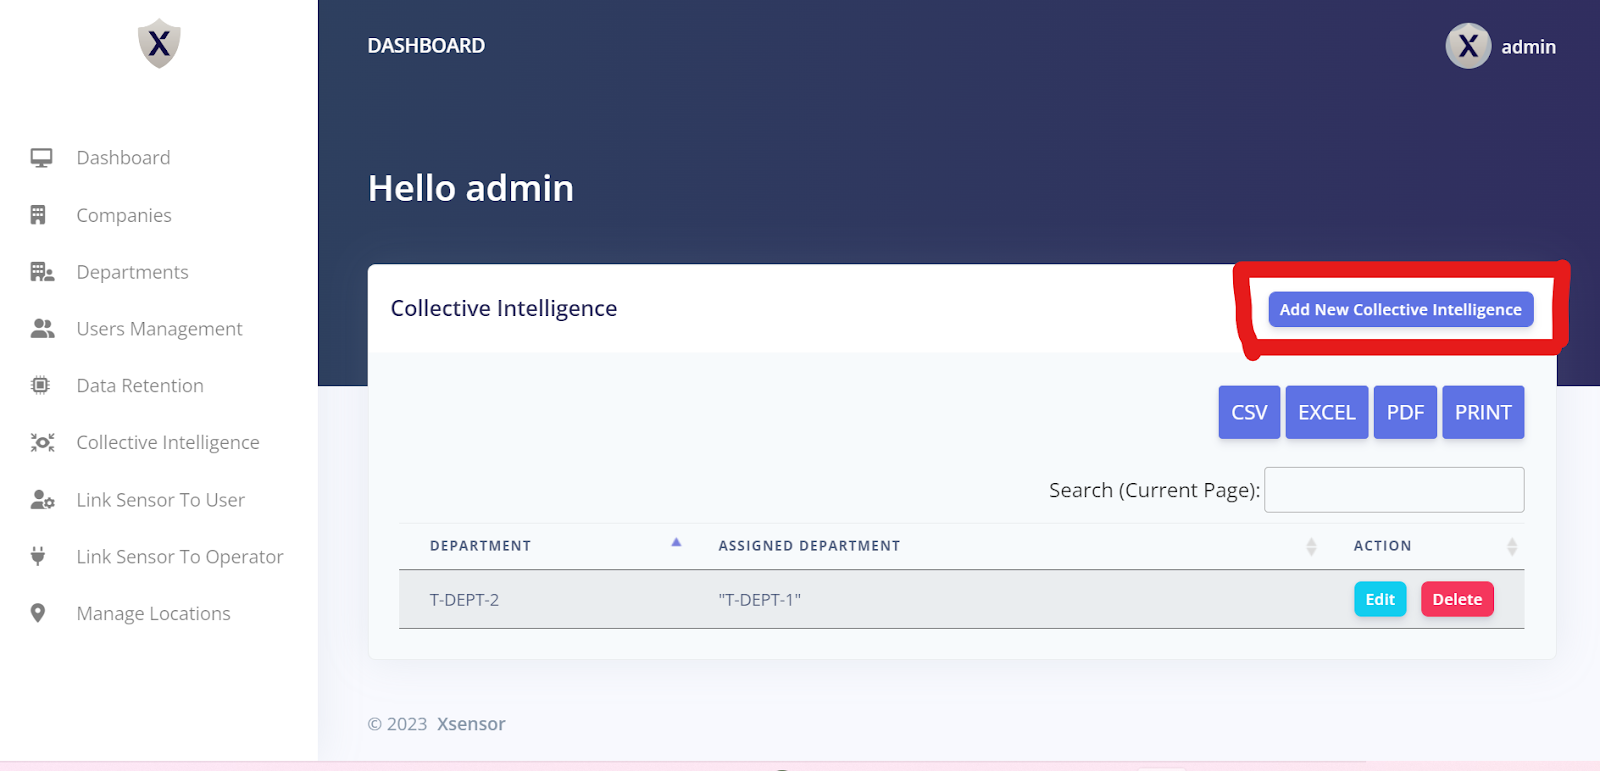
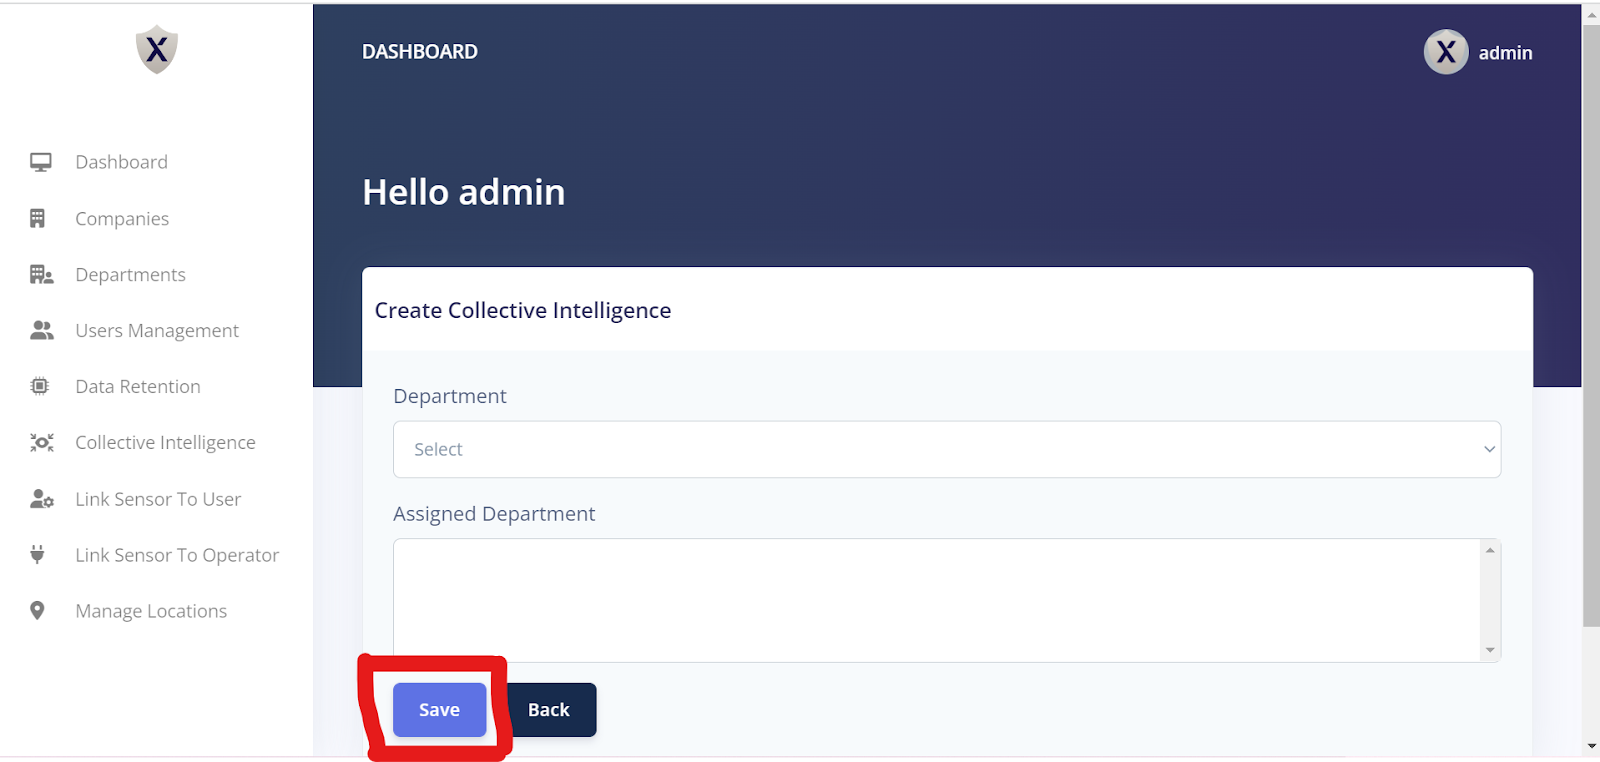
COLLECTIVE INTELLIGENCE
-
How Can We Use Collective Intelligence To Show Department-To-Department Detection Data?
Collective Intelligence To Show Department-To-Department Detection Data
You can use Collective Intelligence to share the data between two departments – for example, Department 1 and Department 2.
You have to assign the data of Department 1 to Department 2 so that the users of Department 2 can also see the detections of Department 1.
If this is not done, the users of Department 2 will not be able to access the data of Department 1.
Steps For Showing Department-To-Department Detection Data