Log in via your Operator/User Account.
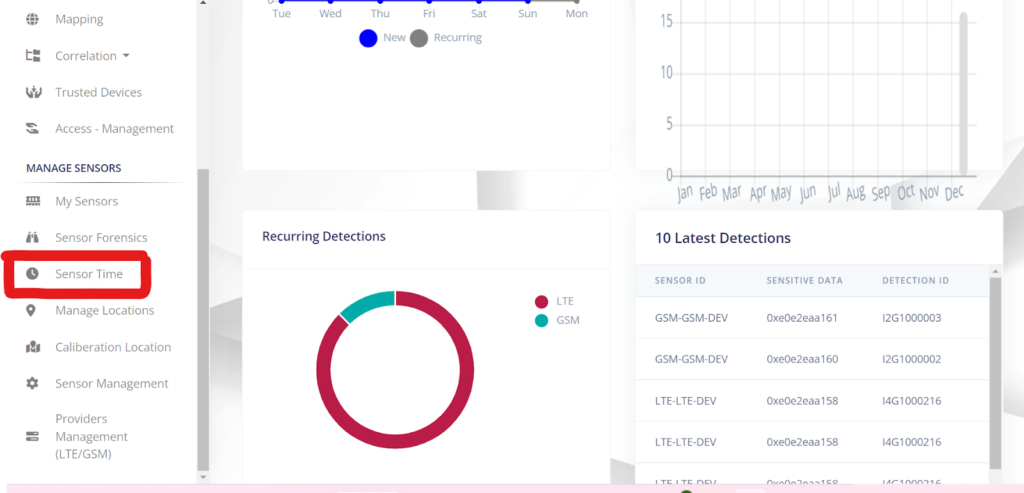
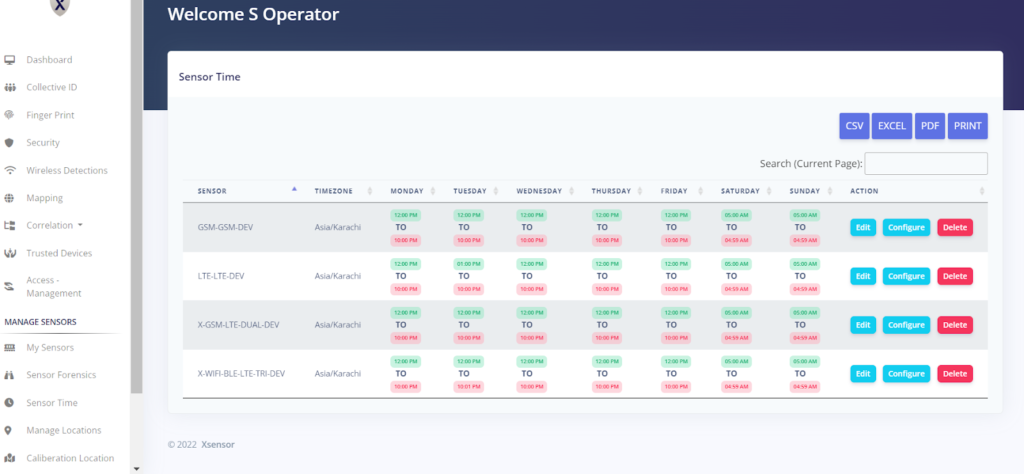
In the Side Menu, you will see a tab named “Sensor Time”. Click on it.
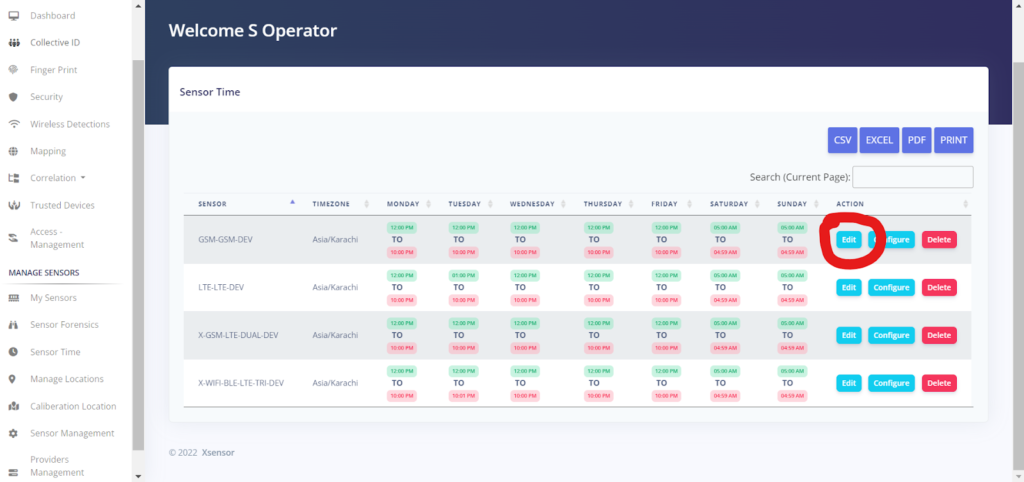
Go to your specific sensor and tap on the “Edit” icon.
You will be redirected to a new page.
Add your timings as per your requirement.
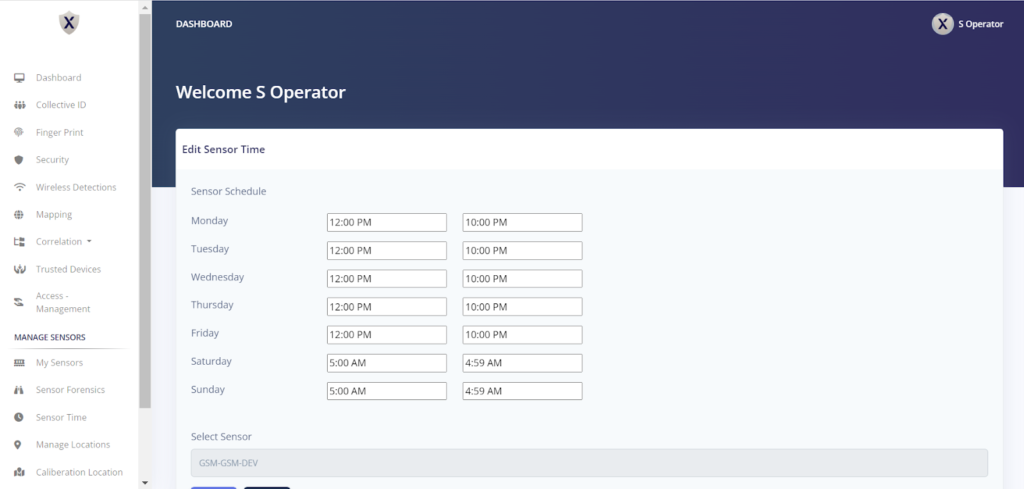
Click on “Save“.
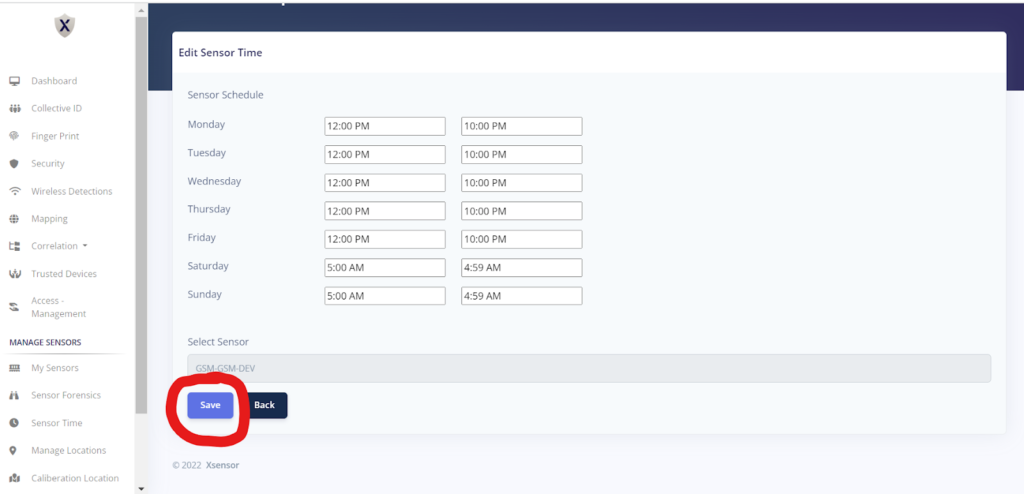
You will be redirected to a page with the adjusted timings.
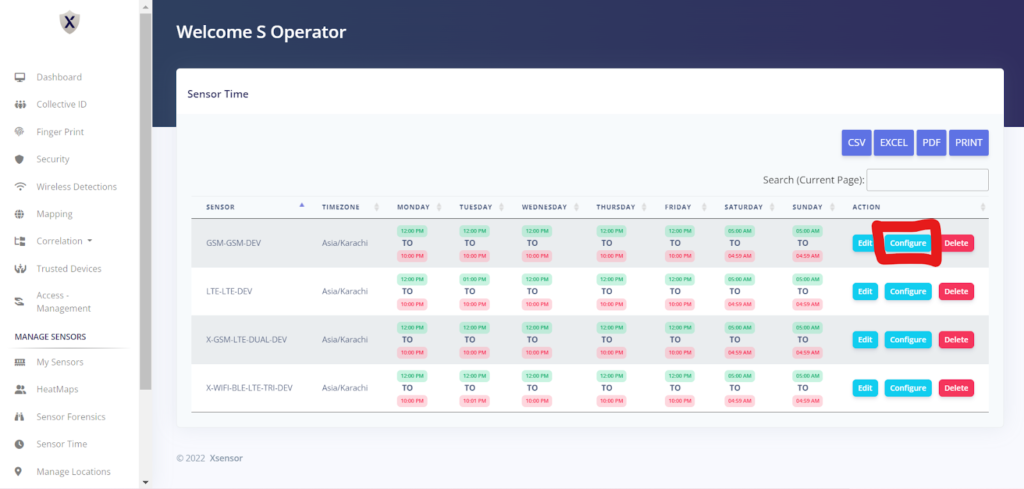
Click on the blue tab named “Configure”.
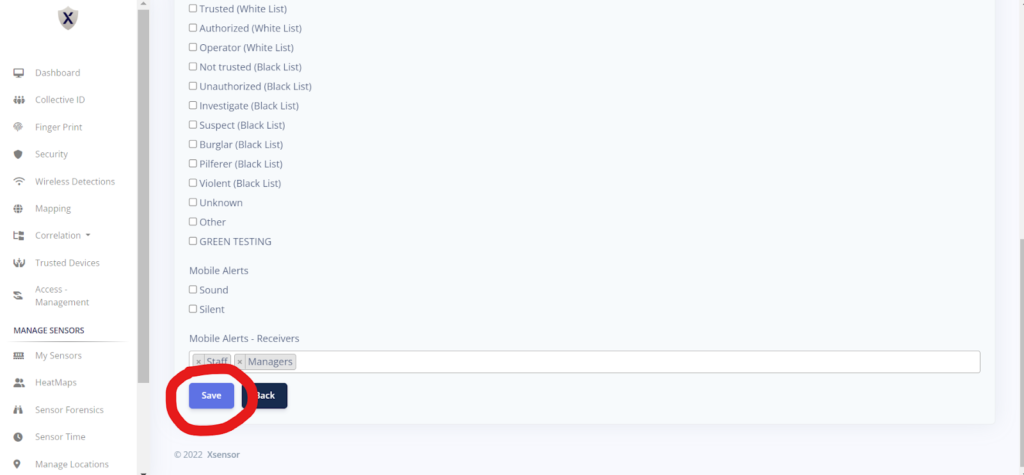
You will be redirected to a page where you set the following:
- Type of Alert
- Country
- Type of Devices
- Mobile Alert Receivers
Lastly, tick the icon you want the notification of.
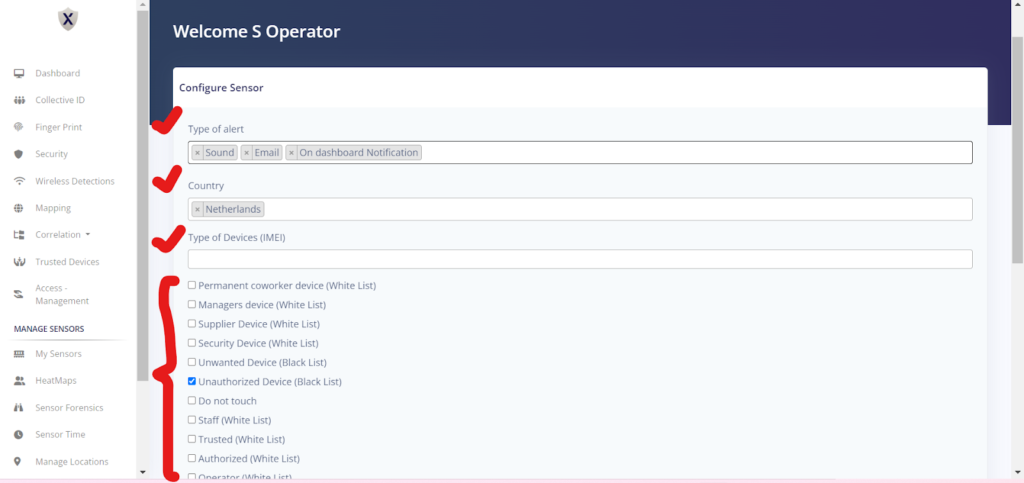
Click on “Save”.